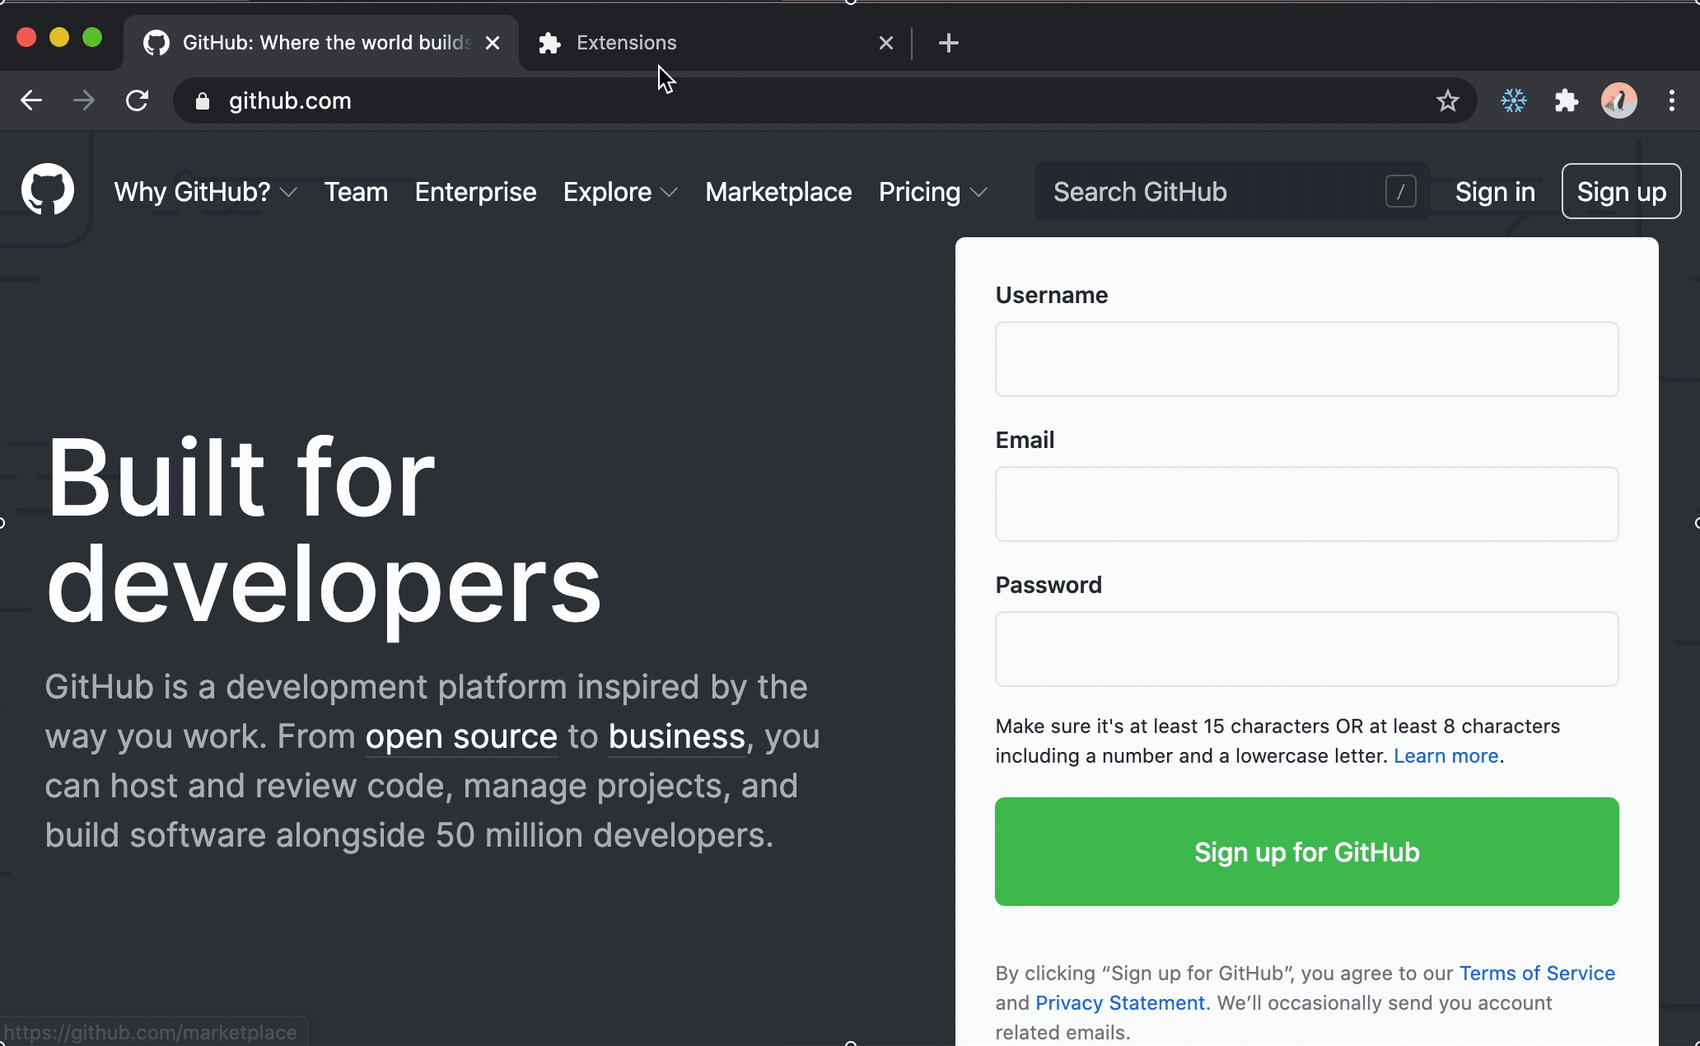
Did you know most Chrome extensions are written in good ol' JavaScript? Turns out, creating one with React is pretty straight forward, too! Let's look at how you can use your existing JavaScript skills to spread some holiday cheer!

Chrome extensions are small programs that can be added to your Chrome browser. Their functionality can vary greatly; some extensions can offer some small tweaks for the browser, while others can be larger and more complex programs. Similar to web pages, Chrome extensions are created with HTML, JavaScript and CSS, so why shouldn't it be possible to develop Chrome extensions with React?
Basics of Chrome Extensions
Before we get started with the project, there are some things to know and bear in mind.
There are three main components of an extension; popup, content script and background script.
- Popups are the content that's shown when the extension's icon is pressed.
- Content script is code, JavaScript or CSS, that's injected into the context of the current webpage.
- Background script is JavaScript code that's run as a separate instance in the browser, and it's mostly used for listening to events and to handle a browser wide state.
We are going to develop an extension that's utilizing these three types of components. The popup will be created with React and TypeScript and the content- and background script will be created with TypeScript. It's also possible to inject a website with React code through the content scripts, but we will not be doing that in our project.
Setting up the project
There are several ways to initialize our React project, one of which is with create-react-app. create-react-app is a great way to get started on a regular web project, but it requires some tweaks to be a viable starting point for a Chrome extension. Instead of tweaking a create-react-app based project, we decided to create a boilerplate project using Webpack, which create-react-app is based on.
Create a project directory with the boilerplate by running the following command. This will create a directory named snow-extension and add the boilerplate.
$ npx degit https://github.com/sivertschou/react-typescript-chrome-extension-boilerplate.git#christmas snow-extensiondegit is a tool for cloning a repository and removing the git files, which is useful when you want to base your project on some boilerplate code.
Navigate to the project directory and install the dependencies by running:
$ npm installNow we're ready to have a look at the code!
Looking at the code
Our project consists of some config files, a public directory, and a src (source) directory. We will start by looking at the public directory.
public
The public directory contains several files used as metadata and configuration of the extension.
- icon16.png
- icon48.png
- icon128.png
- popup.html
- manifest.jsonmanifest.json- Configuration file of the Chrome Extension.popup.html- The mounting point for our React code.icon*.png- Icons used by the Chrome Extension
manifest.json is the most important file for in a Chrome Extension, it contains everything from its name and version number, to which scripts to be used where. We are only going to go through the essentials, but you can read more about the Manifest File Format here.
Let's have a look at our manifest.json file!
name, version, and manifest_version are the only required fields in manifest.json. manifest_version should always be 2, and the rest should be reasonable strings. We are going to create an extension that makes it snow in the browser, and we are going to name fields thereafter.
// public/manifest.json

{
  "name": "Snow Extension",
  "description": "Chrome Extension for making it snow in your browser!",
  "manifest_version": 2,
  "version": "1.0.0",
  ...
icons provides an icon-to-file mapping for Chrome that is used in various situations. These icons should be square to ensure correct displaying, and you should always provide at least an x16, x48, and x128 icon. You can read more about the icons here.
// public/manifest.json

  ...
  "icons": {
    "16": "icon16.png",
    "48": "icon48.png",
    "128": "icon128.png"
  },
...browser_action, and its alternative, page_action, are two possible ways to include a popup in your extension. Browser actions are always available in the browser, but Page actions are set to only be available on certain pages. We are going to make our extension available no matter what the current page is, and we will therefore let it stay as browser_action.
default_icon is used as your extension's clickable icon to the right of the address bar, and default_popup is rendered when the icon is clicked. As we mentioned earlier, we will be mounting our React code to this popup.
// public/manifest.json

  ...
  "browser_action": {
    "default_icon": {
      "16": "icon16.png",
      "48": "icon48.png"
    },
    "default_popup": "popup.html"
  }
  ...
background lets us specify what scripts should be run in the background, and if they should be persistent or not. When the persistent flag is set to false, the script is loaded when needed, and unloaded when it goes idle.
Note that we have specified background.js, and not background.ts. This is because background.ts will be compiled to JavaScript code before it is packaged together with the rest of the build.
// public/manifest.json

  ...
  "background": {
    "scripts": [
      "background.js"
    ],
    "persistent": false
  },
  ...
content_scripts lets us specify the scripts that should be able to access the given webpages, and their context. matches specifies which websites these scripts should have access to, and currently, this is set to every page. You can read more about these Match Patterns here. Similar to how we defined the background scripts, we define the JavaScript code to be injected in the by the js key. Note content_scripts is an array of objects, which means that we could inject different scripts based on the URL matches.
// public/manifest.json

  ...
  "content_scripts": [
    {
      "matches": [
        "*://*/*"
      ],
      "js": [
        "content.js"
      ]
    }
  ]
}
Now that we have looked at the public directory, we can have a look at the actual source code located in src.
src
As with most React projects, we have an App.tsx and App.css file. Instead of index.tsx and index.css, we have popup.tsx and popup.css, which will be mounting the React code (App.tsx) to public/popup.html. background.ts is the script that will be compiled to background.js, and content.ts will be compiled to content.js, and used according to our manifest.json file.
- App.css
- App.tsx
- background.ts
- content.ts
- custom.d.ts
- logo.svg
- popup.css
- popup.tsx
Creating a popup
Let's get started developing this extension!
Our first step will be to build the project and load it into Chrome. We can do that by running the build command.
$ npm run buildThis creates a directory named dist. dist will contain everything from public and the compiled and bundled code.
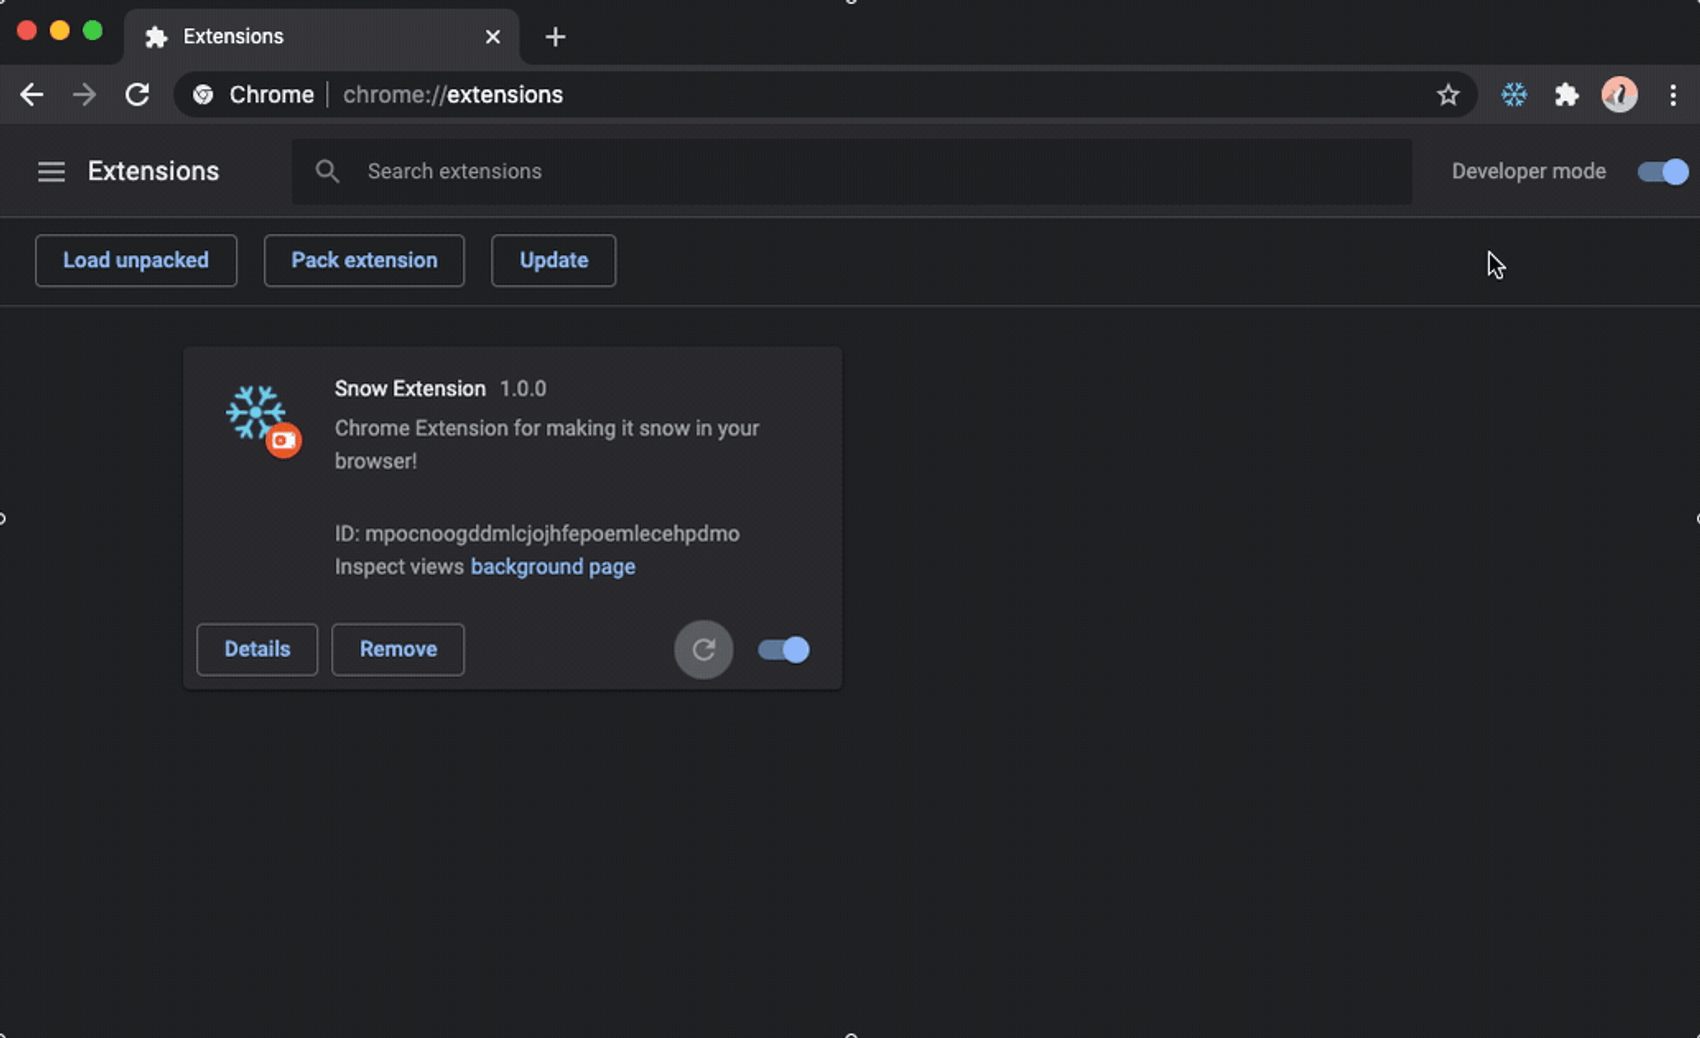
To add the extension to Chrome
- Open Chrome.
- Navigate to
chrome://extensions. - Enable Developer mode.
- Click Load unpacked.
- Select your project's
distdirectory.
Voila! You should now be able to find your extension in Chrome!

We can now change some of the content of App.tsx, rebuild it, and then open the popup again. You should now be able to see your changes without having to reload the app, because the popup is loaded from your targeted dist directory every time it is opened.
Note that you have to reload the app if any of the metadata, content scripts, or background scripts are changed.
If we don't want to build manually, we can use npm start to rebuild our project every time a file is changed!
// src/App.tsx

import * as React from "react";
import logo from "./logo.svg";
import "./App.css";

const App = () => {
  return (
    <div className="App">
      <header className="App-header">
        <img src={logo} className="App-logo" alt="logo" />
        <p>Hello there!</p>
      </header>
    </div>
  );
};

export default App;
Creating a content script
Now that we have our popup ready, it's time to add a content script to make our browser ready for Christmas!
Our current content script does only contain a console.log, so let's make sure we can find that print!
- Open Chrome.
- Open the Console (Mac:
Opt+Cmd+J, Windows/Linux:Shift+Ctrl+J). - Navigate to any website.
- You should see the text printed in the Console.

Let's add some simple HTML to the site! Since we have access to the context of the webpage, we can use default JavaScript to add more HTML, change the styling, and so on. Let's add a title for testing purposes!
// src/content.ts

const header = document.createElement("h1");
header.innerHTML = "Christmas!";

const body = document.getElementsByTagName("body");
body[0]?.prepend(header);
In this script, we are creating a new h1 element and adding it as the HTML body's first child.
Rebuild and reload the project, refresh the web page, and have a look at the result!
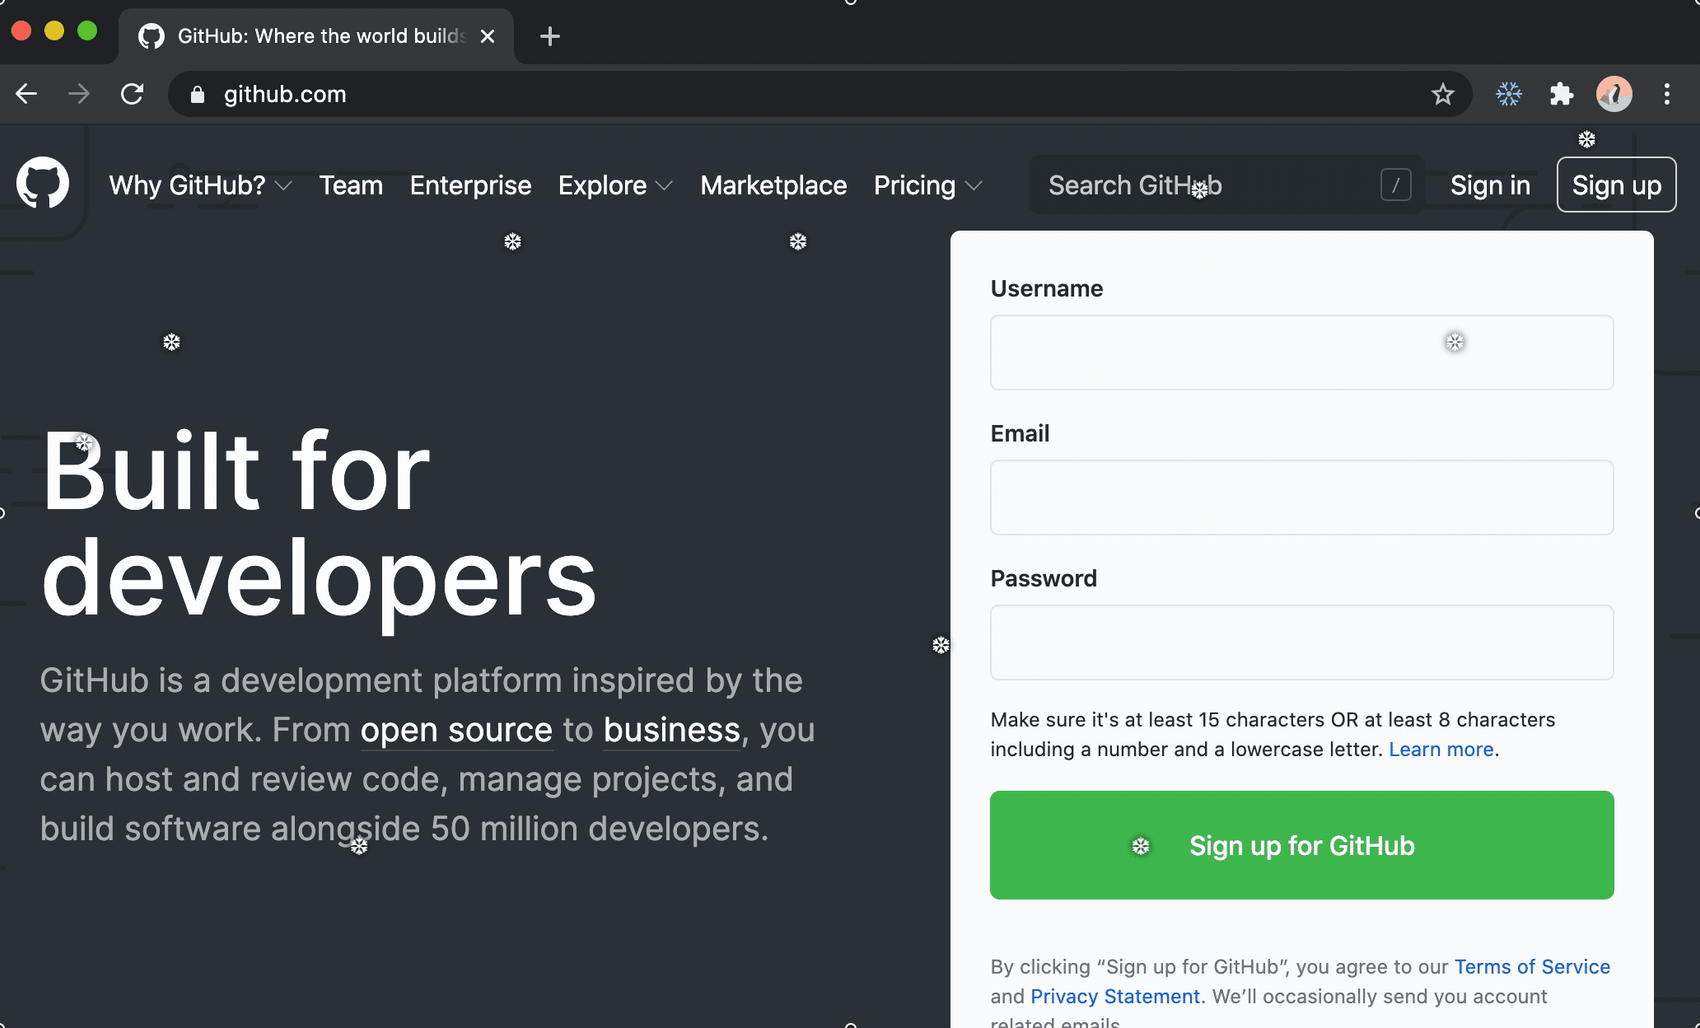
Now, this header is not very christmassy, let's add some snowflakes. We are going to use @pajasevi's CSSSnowflakes as a starting point.
We'll start by recreating the HTML.
// src/content.ts

const body = document.getElementsByTagName("body");

const snowflakesContainer = document.createElement("div");
snowflakesContainer.className = "snowflakes";
snowflakesContainer.setAttribute("aria-hidden", "true");

const snowflake = document.createElement("div");
snowflake.className = "snowflake";
snowflake.innerHTML = "❆";

for (let i = 0; i < 12; i++) {
  snowflakesContainer.appendChild(snowflake.cloneNode(true));
}

body[0]?.prepend(snowflakesContainer);
The result should be something like this:
Now we have to add some styling. Let's create a CSS file named content.css and add @pajasevi's styling.
/* src/content.css */

.snowflake {
  color: #fff;
  font-size: 1em;
  font-family: Arial, sans-serif;
  text-shadow: 0 0 5px #000;
  pointer-events: none;
}

@-webkit-keyframes snowflakes-fall {
  0% {
    top: -10%;
  }
  100% {
    top: 100%;
  }
}
@-webkit-keyframes snowflakes-shake {
  0%,
  100% {
    -webkit-transform: translateX(0);
    transform: translateX(0);
  }
  50% {
    -webkit-transform: translateX(80px);
    transform: translateX(80px);
  }
}
@keyframes snowflakes-fall {
  0% {
    top: -10%;
  }
  100% {
    top: 100%;
  }
}
@keyframes snowflakes-shake {
  0%,
  100% {
    transform: translateX(0);
  }
  50% {
    transform: translateX(80px);
  }
}
.snowflake {
  position: fixed;
  top: -10%;
  z-index: 9999;
  -webkit-user-select: none;
  -moz-user-select: none;
  -ms-user-select: none;
  user-select: none;
  cursor: default;
  -webkit-animation-name: snowflakes-fall, snowflakes-shake;
  -webkit-animation-duration: 10s, 3s;
  -webkit-animation-timing-function: linear, ease-in-out;
  -webkit-animation-iteration-count: infinite, infinite;
  -webkit-animation-play-state: running, running;
  animation-name: snowflakes-fall, snowflakes-shake;
  animation-duration: 10s, 3s;
  animation-timing-function: linear, ease-in-out;
  animation-iteration-count: infinite, infinite;
  animation-play-state: running, running;
}
.snowflake:nth-of-type(0) {
  left: 1%;
  -webkit-animation-delay: 0s, 0s;
  animation-delay: 0s, 0s;
}
.snowflake:nth-of-type(1) {
  left: 10%;
  -webkit-animation-delay: 1s, 1s;
  animation-delay: 1s, 1s;
}
.snowflake:nth-of-type(2) {
  left: 20%;
  -webkit-animation-delay: 6s, 0.5s;
  animation-delay: 6s, 0.5s;
}
.snowflake:nth-of-type(3) {
  left: 30%;
  -webkit-animation-delay: 4s, 2s;
  animation-delay: 4s, 2s;
}
.snowflake:nth-of-type(4) {
  left: 40%;
  -webkit-animation-delay: 2s, 2s;
  animation-delay: 2s, 2s;
}
.snowflake:nth-of-type(5) {
  left: 50%;
  -webkit-animation-delay: 8s, 3s;
  animation-delay: 8s, 3s;
}
.snowflake:nth-of-type(6) {
  left: 60%;
  -webkit-animation-delay: 6s, 2s;
  animation-delay: 6s, 2s;
}
.snowflake:nth-of-type(7) {
  left: 70%;
  -webkit-animation-delay: 2.5s, 1s;
  animation-delay: 2.5s, 1s;
}
.snowflake:nth-of-type(8) {
  left: 80%;
  -webkit-animation-delay: 1s, 0s;
  animation-delay: 1s, 0s;
}
.snowflake:nth-of-type(9) {
  left: 90%;
  -webkit-animation-delay: 3s, 1.5s;
  animation-delay: 3s, 1.5s;
}
.snowflake:nth-of-type(10) {
  left: 25%;
  -webkit-animation-delay: 2s, 0s;
  animation-delay: 2s, 0s;
}
.snowflake:nth-of-type(11) {
  left: 65%;
  -webkit-animation-delay: 4s, 2.5s;
  animation-delay: 4s, 2.5s;
}
To make sure the CSS is loaded, add an import statement at the beginning of the content.ts file. Rebuild the project, reload the extension in Chrome, and refresh the web page.
// src/content.ts

import "./content.css";

const body = document.getElementsByTagName("body")

const snowflakesContainer = document.createElement("div");
...
It should now be snowing in your browser!
This is great and all, but you might want to be able to disable the effect at some point. Let's add some functionality to control the browser weather ❄️.
Communication between the components
We plan to create a button in the popup which enables us to toggle the snow. Since every component (popup, content scrip, and background script) is isolated, we have to use Chrome's communication API to be able to send a message between the components. We want our background script to function as a browser wide state, and therefore all the communication should go through it.
Communication between popup and background script
We will start by listening to messages from our background script.
// src/background.ts

chrome.runtime.onMessage.addListener((request) => {
  console.log("Message received in background.js!", request);
});
Now we need to create a button in our popup to send a message to the background script.
// src/App.tsx

import * as React from "react";
import { Button } from "./components/Button/Button";

const App = () => {
  return <Button />;
};

export default App;
// src/components/Button/Button.tsx
import * as React from "react";
import "./Button.css";
export const Button = () => {
const [snowing, setSnowing] = React.useState(true);
const onClick = () => {
setSnowing(!snowing);
};
return (
<div className="buttonContainer">
<button className="snowButton" onClick={onClick}>
{snowing ? "Disable the snow 🥶" : "Let it snow! ❄️"}
</button>
</div>
);
};/* src/components/Button.css */
.snowButton {
border: 0;
background-color: #1a1d22;
color: white;
padding: 5px 10px;
width: 100%;
cursor: pointer;
}
.buttonContainer {
display: flex;
background-color: #282c34;
color: white;
min-width: 150px;
padding: 10px;
}Now, this button is only cosmetic, and the only thing it does is toggle between our local snowing state. Let's make it send a message to the background script! We will change the onClick function to make it send a message.
// src/components/Button/Button.tsx

const onClick = () => {
  setSnowing(!snowing);
  chrome.runtime.sendMessage("Hello from the popup!");
};
To be able to see the background's print, we have to open its console. We can do that by navigating to our extension on chrome://extensions and clicking the Inspect views background page-button.

Great! We can now communicate from the popup to the background. Since the popup's state is cleared every time it is closed, we should ask the background whether it is snowing or not. For this, we will define some types that will be used for all the communication.
// src/types.ts

// Popup or content script requesting the current status
interface SnowRequest {
  type: "REQ_SNOW_STATUS";
}

// Background script broadcasting current status
interface SnowResponse {
  type: "SNOW_STATUS";
  snowing: boolean;
}

// Popup requesting background script for status change
interface SnowToggle {
  type: "TOGGLE_SNOW";
  snowing: boolean;
}

export type MessageType = SnowRequest | SnowResponse | SnowToggle;
We can update our background to take different actions depending on the received message type.
// src/background.ts

import { MessageType } from "./types";

const sendSnowStatus = (snowing: boolean) => {
  chrome.runtime.sendMessage({ type: "SNOW_STATUS", snowing });
};

let snowing = false;

// Get locally stored value
chrome.storage.local.get("snowing", (res) => {
  if (res["snowing"]) {
    snowing = true;
  } else {
    snowing = false;
  }
});

chrome.runtime.onMessage.addListener((message: MessageType) => {
  switch (message.type) {
    case "REQ_SNOW_STATUS":
      sendSnowStatus(snowing);
      break;
    case "TOGGLE_SNOW":
      snowing = message.snowing;
      chrome.storage.local.set({ snowing: snowing });
      sendSnowStatus(snowing);
      break;
    default:
      break;
  }
});
To make sure the popup is up to date, it will ask for the snow status when it is mounted ("REQ_SNOW_STATUS"). When it wants to toggle the snow when pressed, it sends a "TOGGLE_SNOW" message and the snowing state.
We have to specify our use of chrome.storage in manifest.json. We do that by specifying it in our permission array. There are several other parts of the Chrome API that requires permission specification, and you can read more about these here.
// public/manifest.json

{
  "name": "Snow Extension",
  "description": "Chrome Extension for making it snow in your browser!",
  "manifest_version": 2,
  "version": "1.0.0",
  "icons": {
    "16": "icon16.png",
    "48": "icon48.png",
    "128": "icon128.png"
  },
  "browser_action": {
    "default_icon": {
      "16": "icon16.png",
      "48": "icon48.png"
    },
    "default_popup": "popup.html"
  },
  "background": {
    "scripts": ["background.js"],
    "persistent": false
  },
  "content_scripts": [
    {
      "matches": ["*://*/*"],
      "js": ["content.js"]
    }
  ],
  "permissions": ["storage"]
}
// src/components/Button/Button.tsx
import * as React from "react";
import { MessageType } from "../../types";
import "./Button.css";
export const Button = () => {
const [snowing, setSnowing] = React.useState(true);
React.useEffect(() => {
chrome.runtime.sendMessage({ type: "REQ_SNOW_STATUS" });
chrome.runtime.onMessage.addListener((message: MessageType) => {
switch (message.type) {
case "SNOW_STATUS":
setSnowing(message.snowing);
break;
default:
break;
}
});
}, []);
const onClick = () => {
chrome.runtime.sendMessage({ type: "TOGGLE_SNOW", snowing: !snowing });
};
return (
<div className="buttonContainer">
<button className="snowButton" onClick={onClick}>
{snowing ? "Disable the snow 🥶" : "Let it snow! ❄️"}
</button>
</div>
);
};We should now be able to see the button's state changing when pressed - even though we removed our setSnowing in the onClick function. The popup will send the request to the background script, the background script will update its snowing variable and send the updated status back. The popup will then update its value when a "SNOW_STATUS" message is received.
Note that it doesn't affect the snow. This is because we haven't added communication between the background script and the content script.
Communication between background script and content script
To be able to actually toggle the snow, the content script has to add a listener, just like the popup.
// src/content.ts

import "./content.css";
import { MessageType } from "./types";

const body = document.getElementsByTagName("body");

const snowflakesContainer = document.createElement("div");
snowflakesContainer.className = "snowflakes";
snowflakesContainer.setAttribute("aria-hidden", "true");

const snowflake = document.createElement("div");
snowflake.className = "snowflake";
snowflake.innerHTML = "❆";

for (let i = 0; i < 12; i++) {
  snowflakesContainer.appendChild(snowflake.cloneNode(true));
}

chrome.runtime.sendMessage({ type: "REQ_SNOW_STATUS" });

let snowing = false;
chrome.runtime.onMessage.addListener((message: MessageType) => {
  switch (message.type) {
    case "SNOW_STATUS":
      if (message.snowing) {
        if (!snowing) {
          body[0]?.prepend(snowflakesContainer);
        }
      } else {
        snowflakesContainer.parentNode?.removeChild(snowflakesContainer);
      }
      snowing = message.snowing;
      break;
    default:
      break;
  }
});
It is just the same kind of flow as the popup; request the snow status and listen for responses. We only care about "SNOW_STATUS". We want to add the snowflakes container to the DOM, only if the message status is snowing and our local status is not snowing. This is to make sure that we don't try to add it after it already has been added.
There is however a difference in how you communicate with the content injections compared to the popups. chrome.runtime.sendMessage can be used to pass messages to popups and background scripts, and chrome.tabs.sendMessage can be used to pass messages to content scripts. chrome.tabs.sendMessage requires the id of a specified tab. We can get tabs by running a query with different query parameters. Some query parameters could be if the tab is active, muted, and so on. We want to send this status message to every tab, and we will therefore pass an empty object as our query parameter. You can read more about the query here.
// src/background.ts

import { MessageType } from "./types";

const sendSnowStatus = (snowing: boolean) => {
  const message = { type: "SNOW_STATUS", snowing };

  // send message to popup
  chrome.runtime.sendMessage(message);

  // send message to every active tab
  chrome.tabs.query({}, (tabs) => {
    tabs.forEach((tab) => {
      if (tab.id) {
        chrome.tabs.sendMessage(tab.id, message);
      }
    });
  });
};

let snowing = false;

// Get locally stored value
chrome.storage.local.get("snowing", (res) => {
  if (res["snowing"]) {
    snowing = true;
  } else {
    snowing = false;
  }
});

chrome.runtime.onMessage.addListener((message: MessageType) => {
  switch (message.type) {
    case "REQ_SNOW_STATUS":
      sendSnowStatus(snowing);
      break;
    case "TOGGLE_SNOW":
      snowing = message.snowing;
      chrome.storage.local.set({ snowing: snowing });
      sendSnowStatus(snowing);
      break;
    default:
      break;
  }
});
You should now be able to toggle the snow with the popup button! Remember that you have to reload the extension and reload each page before the changes are applied!

Where to go from here
This was only a quick introduction to how you can get started developing Chrome Extensions with React and TypeScript. Have a look at https://developer.chrome.com/extensions for more information and samples.
If you develop an extension of your own, you can of course also share it on the Chrome Web Store. You can actually find this extension there as well!
You can also find the complete project on GitHub. ❄️