This post explores how you can create your own generative art in the web browser using functional programming in the ClojureScript programming language.
Creative programming is about writing code to create an expression rather than developing some kind of functionality. It's an enjoyable process that can be used to create all kinds of art pieces, be it still images, animations, music etc. It's also a great framework for learning new programming languages.
ClojureScript, or cljs for short, is a Lisp that compiles to javascript. It's a dynamic, functional programming language with great support for an interactive development process, making it a perfect fit for the type of explorative, creative programming that generative art often resemble.
We will create an art piece based on a Perlin noise flow field. It uses Perlin noise to move some thousand particles across the screen in an organic looking fashion. As opposed to white noise, Perlin noise is a controlled type of noise where two values drawn from close to each other in the noise map will have similar, but still random values.
We will be using a library called Quil to create a drawing using the browser canvas api, along with a library called Figwheel for building and hot loading the code as it evolves.
A file deps.edn in the project root defines the dependencies for this setup.
{:paths ["src" "resources" "target"]
 :deps  {org.clojure/clojure       {:mvn/version "1.10.0"}
         com.bhauman/figwheel-main {:mvn/version "0.2.0"}
         quil                      {:mvn/version "3.0.0"}}}
To kick things off, we define a namespace to hold our code in src/sketches/perlin_flow.cljs, and bring in the needed Quil functions.
(ns sketches.perlin-flow
  (:require [quil.core :as q]
            [quil.middleware :as middleware]))
A developement build called dev is defined by placing a file dev.cljs.edn in the root of the project. This file instructs our build on what namespace that should run initially when the built javascript file loads.
{:main sketches.perlin_flow}A simple resources/public/index.html loads the resulting sketch in the browser.
<!DOCTYPE html>
<html>
  <head>
    <title>Perlin noise flow field</title>
    <meta name="viewport" content="width=device-width, initial-scale=1" />
    <link rel="shortcut icon" type="image/x-icon" href="data:image/x-icon;," />
    <style>
      html,
      body {
        width: 100%;
        height: 100%;
        padding: 0;
        margin: 0;
      }
    </style>
  </head>
  <body>
    <div id="sketch"></div>
    <script src="cljs-out/dev-main.js"></script>
  </body>
</html>
Running the build is a matter of letting clojure know where to begin, and further instructing figwheel what build we want to be using, i.e. the dev one.
clojure -m figwheel.main -b devA couple of vars w and h used throughout our sketch is defined to hold the width and height of the browser window. This also shows a general example of how function calls are made in a lisp, by placing the name of the function to be called as the first element in the list (i.e. inside the parens). However, it also shows the somewhat cryptic approach cljs takes to javascript interop, where a .- prefix in front of the name is how properties of native javascript objects are looked up. We will generally not be needing this prefix, as most our code simply refers ClojureScript vars and functions directly.
(def body (.-body js/document))
(def w (.-clientWidth body))
(def h (.-clientHeight body))
We define a function create to create our sketch by passing it the nescessary options. This defines the essense of our sketch, namely what functions will be used for state setup, update and draw. We'll keep them minimal for now. The setup function sets up our drawing's state, i.e. an empty vector []. The update function gets the state of our sketch as and argument and simply returns it. The draw function, well, draws our sketch to the actual canvas in the browser. It also receives the state as an argument, but as of now, simply draws an ellipse to the center of the screen, on a dark background color.
(defn sketch-setup []
  [])


(defn sketch-update [state]
  state)


(defn sketch-draw [state]
  (q/background 30)
  (q/ellipse (/ w 2) (/ h 2) 100 100))


(defn create [canvas]
  (q/sketch
    :host canvas
    :size [w h]
    :draw #'sketch-draw
    :setup #'sketch-setup
    :update #'sketch-update
    :middleware [middleware/fun-mode]
    :settings (fn []
                (q/random-seed 666)
                (q/noise-seed 666))))
By seeding Quil's random and noise functions we ensure reprodusable results across page reloads even though we will be calling a couple of functions providing random values.
A clever cljs macro, defonce, ensures that we only create one instance of the sketch, even though the namespace is reloaded by figwheel each time the sketch file is saved.
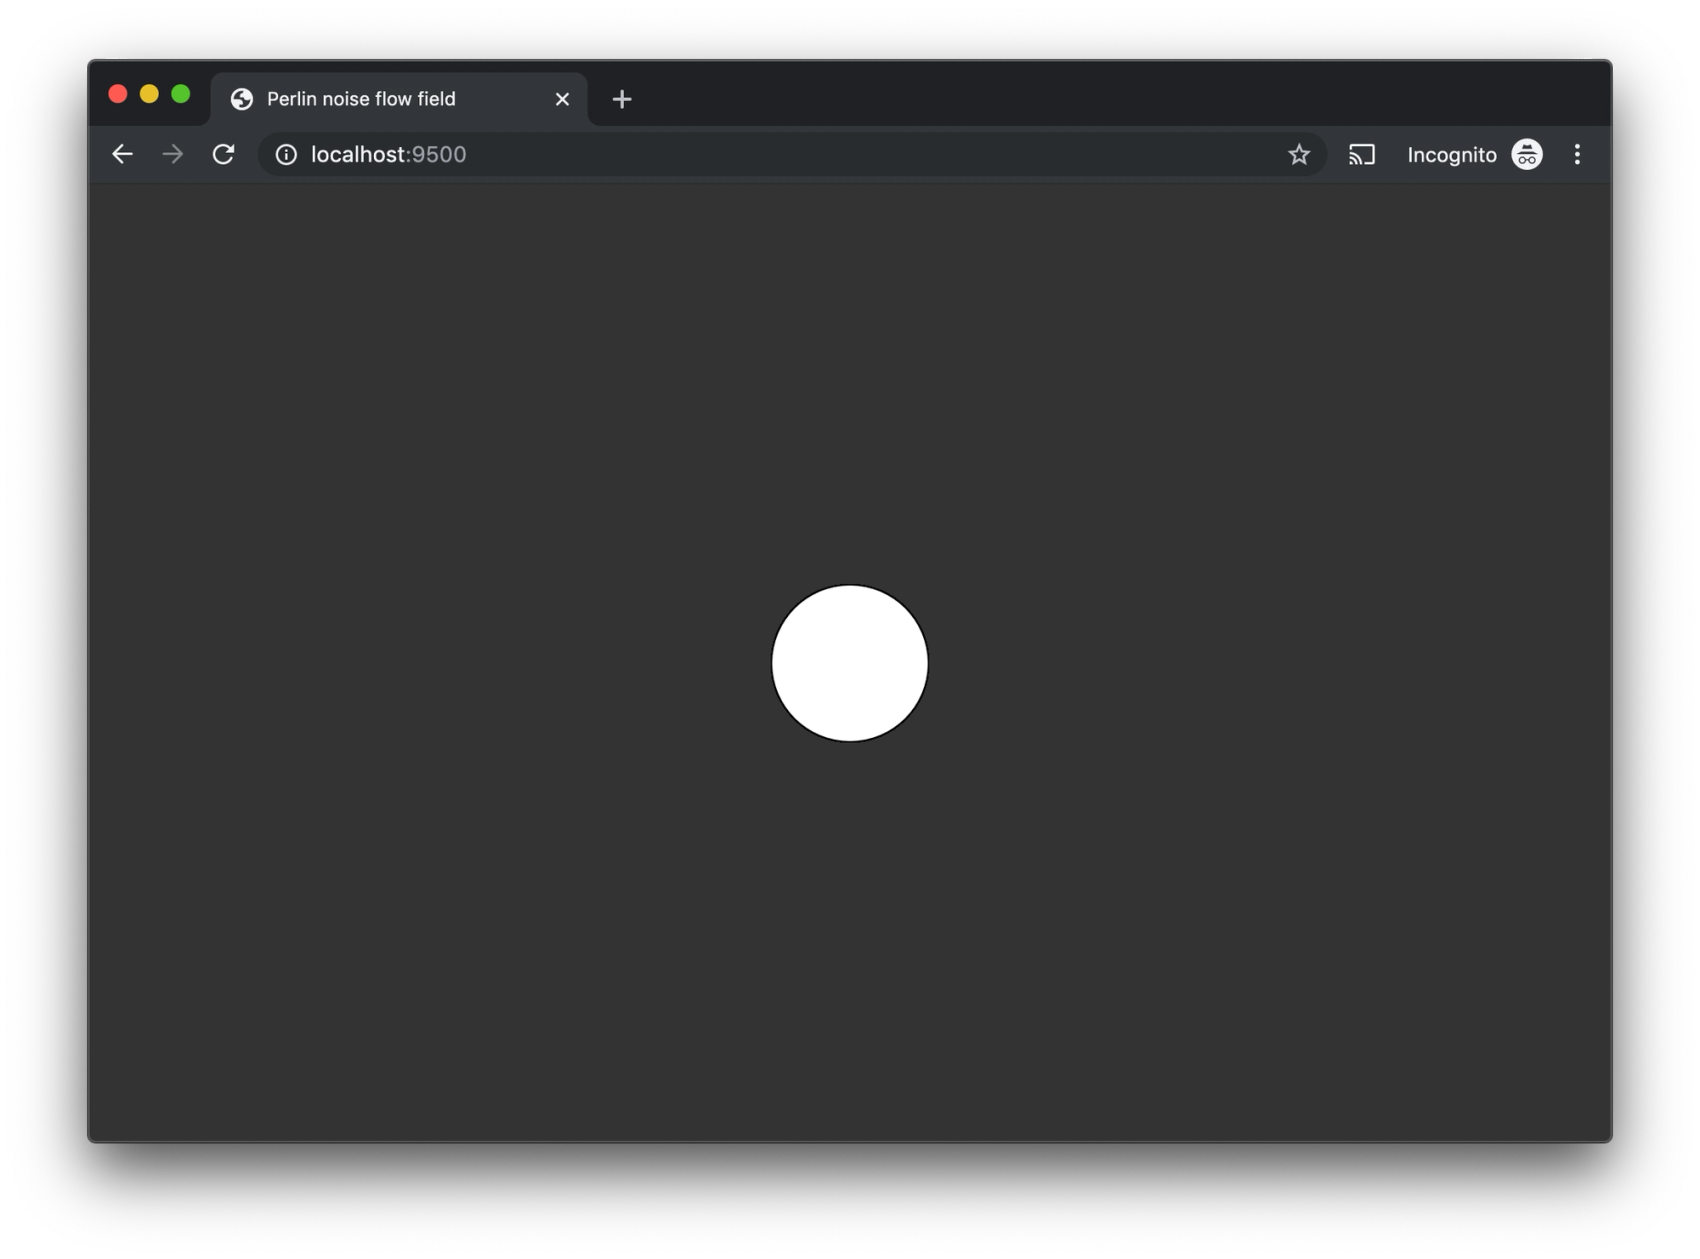
(defonce sketch (create "sketch"))A white circle appears.
Try it yourself (Hint: click "Run" in the top left corner)
The keen-eyed would have noticed our create function also brings out Quil's fun-mode middleware to enable a functional workflow for our sketch. (It's going to be fun as well, I promise.) This enables a data flow coherent with functional thinking, such that sketch-setup returns the initial state of the sketch, while sketch-update can be free of side effects, operating only on the immutable state received as an argument, returning the state for the next iteration. sketch-draw needs side effects to be able to draw to the canvas.
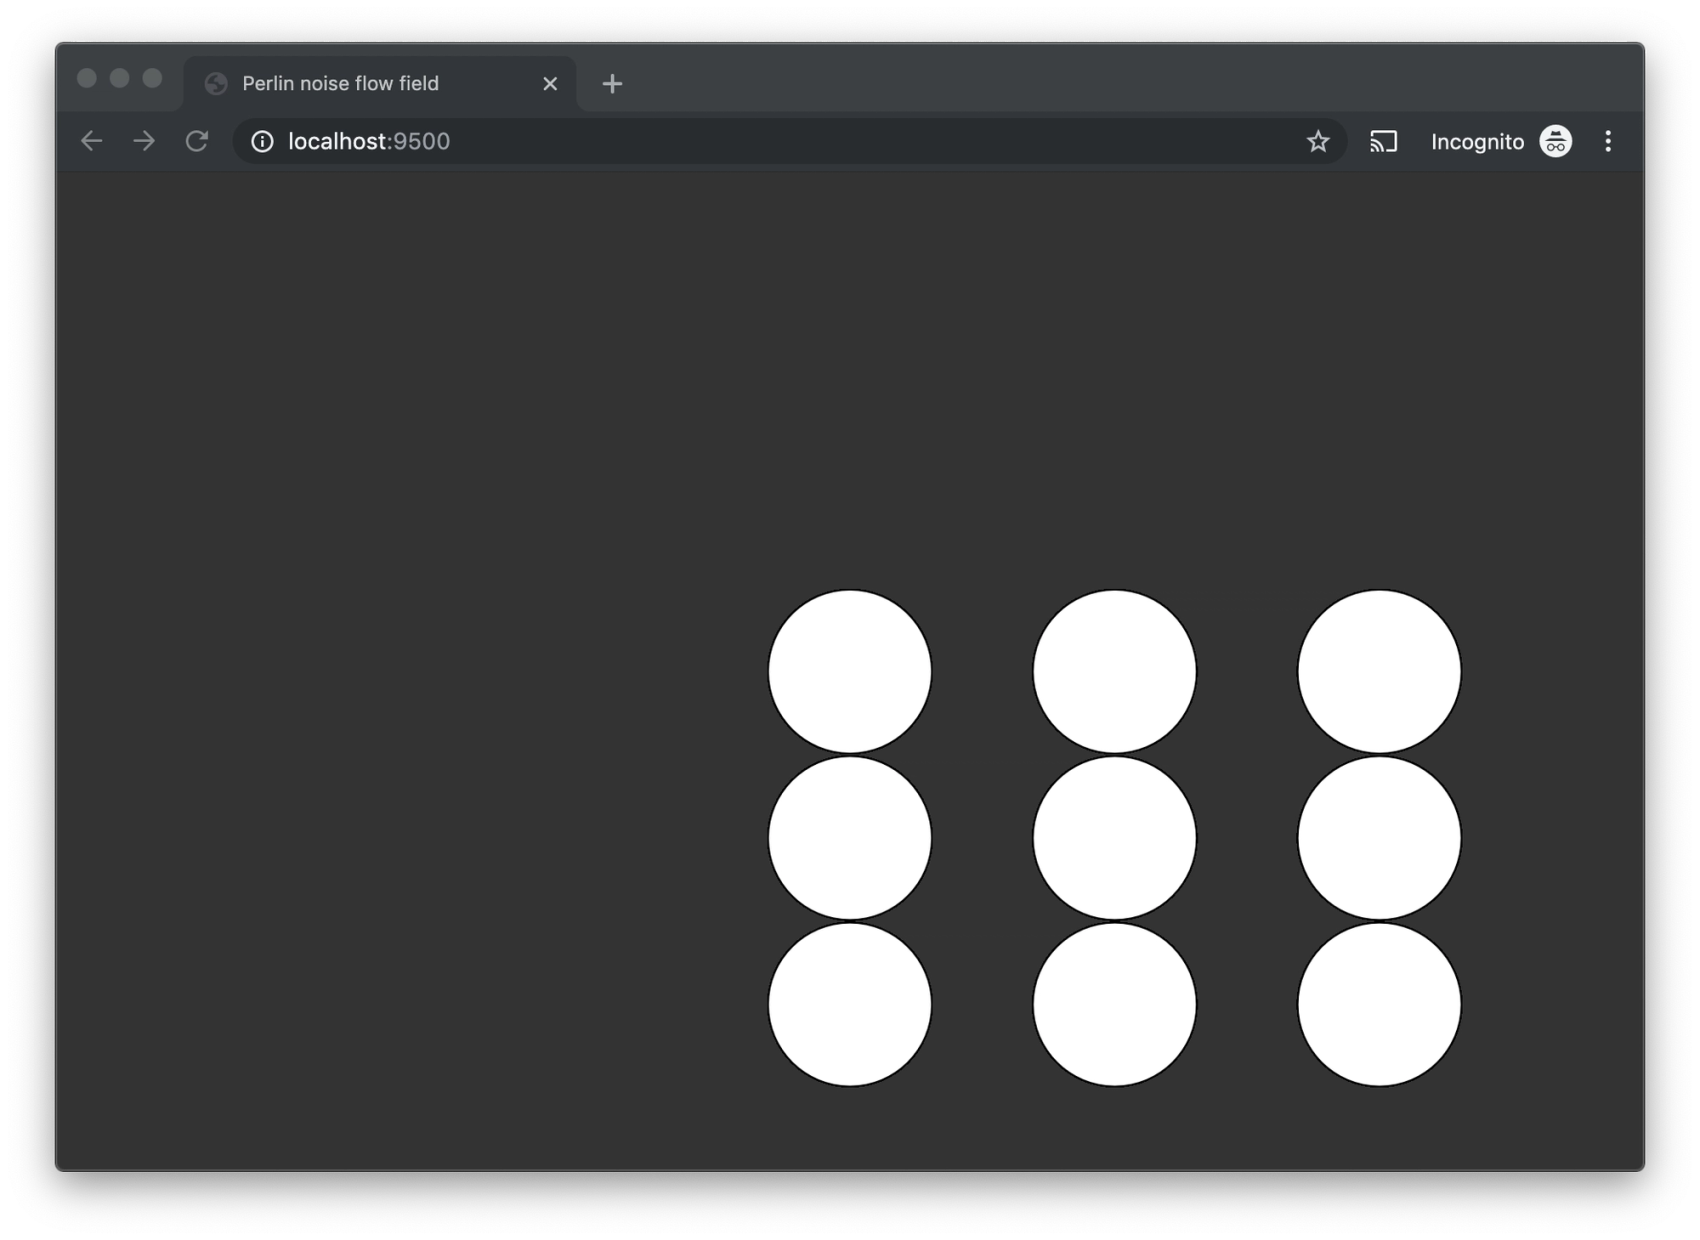
A couple of iterations with saved changes to sketch-draw might result in something like the following. As the canvas remembers what's been previously drawn, multiple circles will be shown in the image.
Not a masterpiece, to say the least. Let's up the game.
Every piece of generative art needs a pretty palette. This palette is a map of predefined colors, on the form of vectors with rgb values. We'll use this palette to spice things up a bit when drawing particles to our canvas.
(def palette
  {:name       "purple haze"
   :background [10 10 10]
   :colors     [[32 0 40]
                [82 15 125]
                [99 53 126]
                [102 10 150]
                [132 26 200]
                [165 32 250]
                [196 106 251]]})
The state for this sketch will hold a vector of these particles, created by mapping the particle function over the range of numbers from 0 to 2000. On each change of the setup function we have to reload the page, as the defonce mentioned above keeps the sketch from re-initializing.
(defn sketch-setup
  "Returns the initial state to use for the update-render loop."
  []
  (map particle (range 0 2000)))
Each particle is a map consisting of the :id of the particle, :x and :y representing its position constrained by the screen size, :vx and :vy representing its speed in the x and y directions respectively, :size representing the particle's size in pixels, :direction representing the direction of each particle and a random :color drawn from the palette.
(defn particle
  "Creates a particle map."
  [id]
  {:id         id
   :vx         1
   :vy         1
   :size       3
   :direction  0
   :x          (q/random w)
   :y          (q/random h)
   :color      (rand-nth (:colors palette))})
Our draw function starts off by clearing what was previously drawn by setting a new background color with q/background. q/no-stroke ensure there's no stroke around each particle. Subsequently, it uses doseq to process each particle p from our state of particles (returned by sketch-setup) for side effects. It uses the Quil function q/fill to set the color of what is about to be drawn to that of the :color the particle, and calls out to q/ellipse to draw a circle at the :x and :y positions of each particle with its :size.
(defn sketch-draw
  "Draws the current state to the canvas. Called on each iteration after sketch-update."
  [particles]
  (apply q/background (:background palette))
  (q/no-stroke)
  (doseq [p particles]
    (apply q/fill (:color p))
    (q/ellipse (:x p) (:y p) (:size p) (:size p))))
This is what we get.
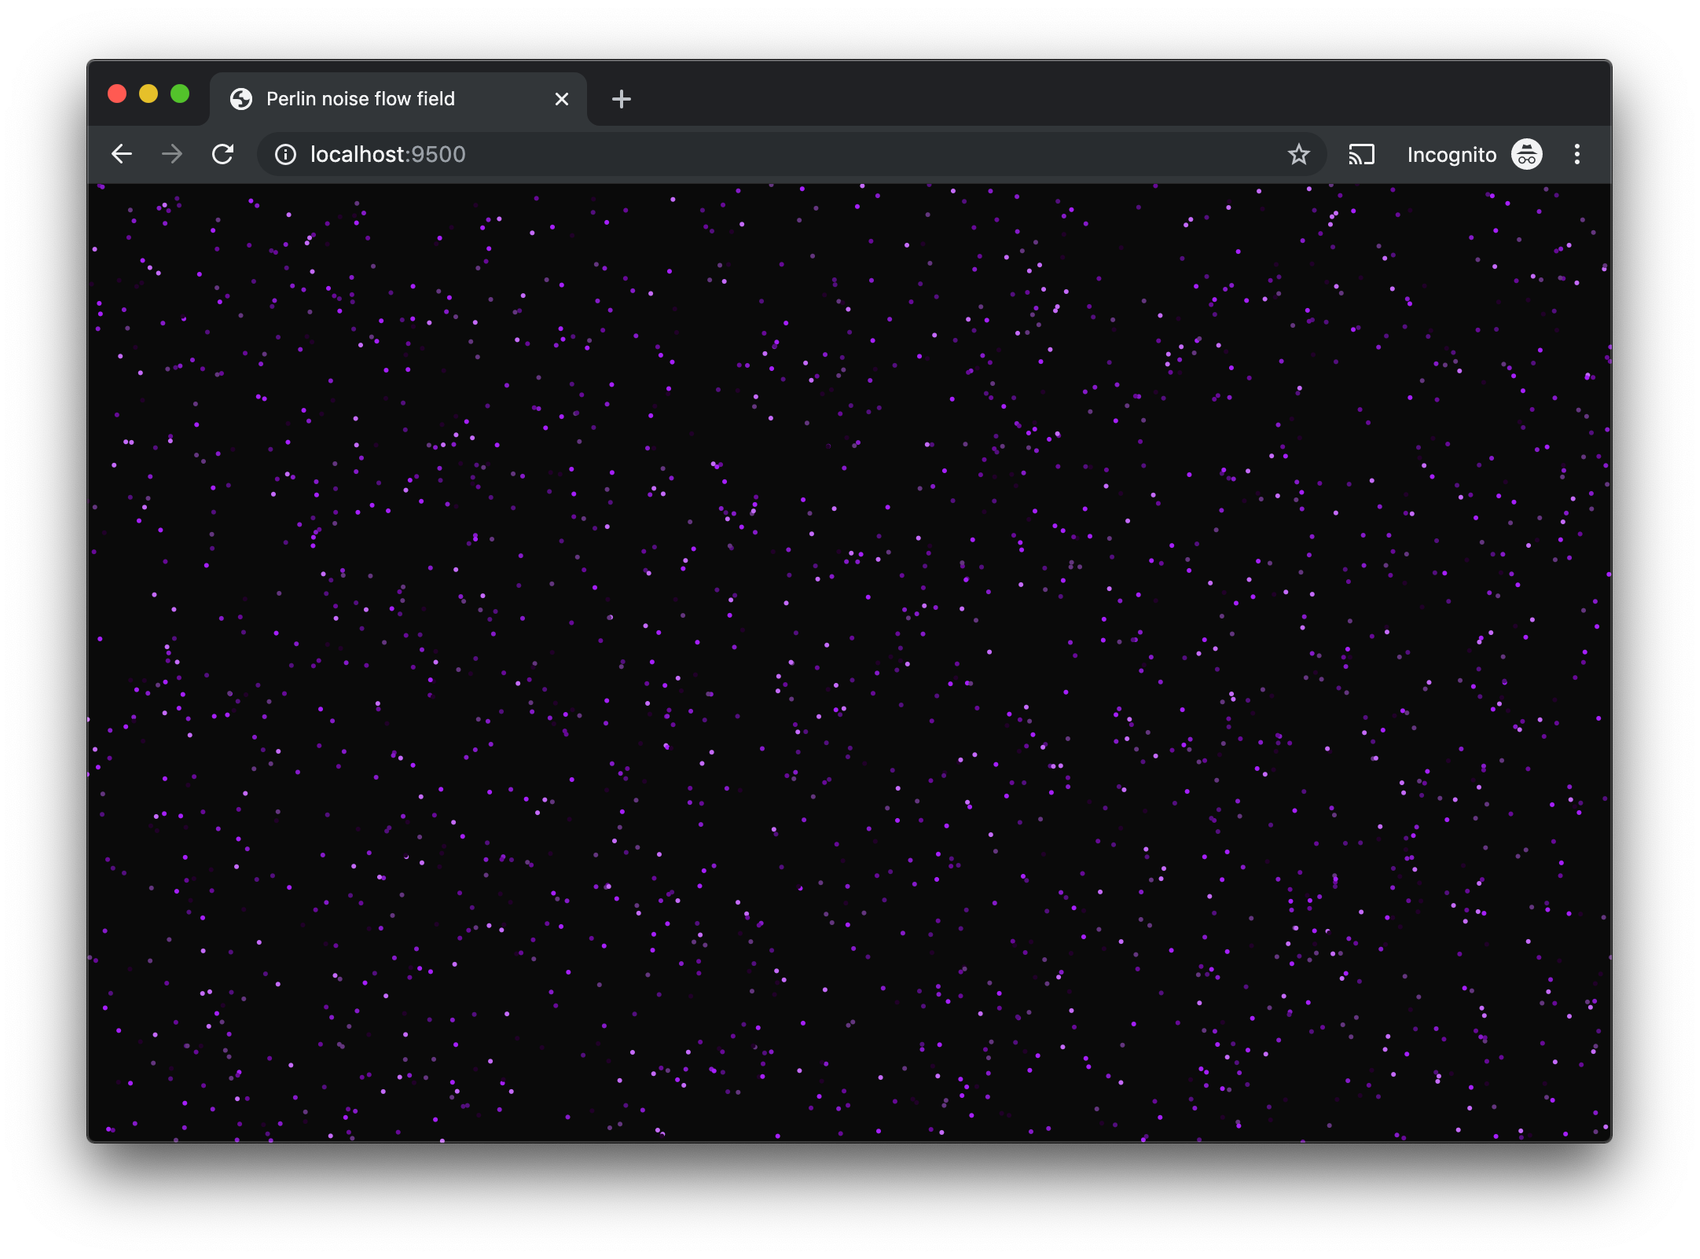
Already it's starting to look good, albeit static. Let's fix that.
Our sketch-update function receives the current state of particles and its task is to update their state for the next iteration of the drawing, before sketch-draw will draw the resulting state to the canvas. The update and draw functions will be called after one another for the lifetime of the sketch, resembling our program's render-loop. The following function definition moves each particle according to its current position by adding in its velocity in each direction. By running the modulo function mod on each resulting position, we ensure that particles come back on the opposite side of the screen if they move outside the screen bounds. The cljs function assoc associates new values for the given keys in each map.
(defn position
  "Calculates the next position based on the current, the speed and a max."
  [current delta max]
  (mod (+ current delta) max))


(defn sketch-update
  "Receives the current state. Returns the next state to render."
  [particles]
  (map (fn [p]
         (assoc p
                :x (position (:x p) (:vx p) w)
                :y (position (:y p) (:vy p) h)))
       particles))
The fact that none of our defined functions have their own state, means that Figwheel is able to patch the running javascript code with redefinitions we make to the source without loosing the current state of the sketch or what has been previously drawn. This is an amazing feature when experimenting with generative art, and provides an immensely short feedback loop - a must when letting your creative juices flow!
Look! It's moving.

Simply by removing the one line of code from the draw function that clears the background we see a radically different expression in our drawing. If you are coding along you would be starting to feel the effects that this kind of short feedback loop setup can have.
(defn sketch-draw
  "Draws the current state to the canvas. Called on each iteration after sketch-update."
  [particles]
  (apply q/background (:background palette))
  (q/no-stroke)
  (doseq [p particles]
    (apply q/fill (:color p))
    (q/ellipse (:x p) (:y p) (:size p) (:size p))))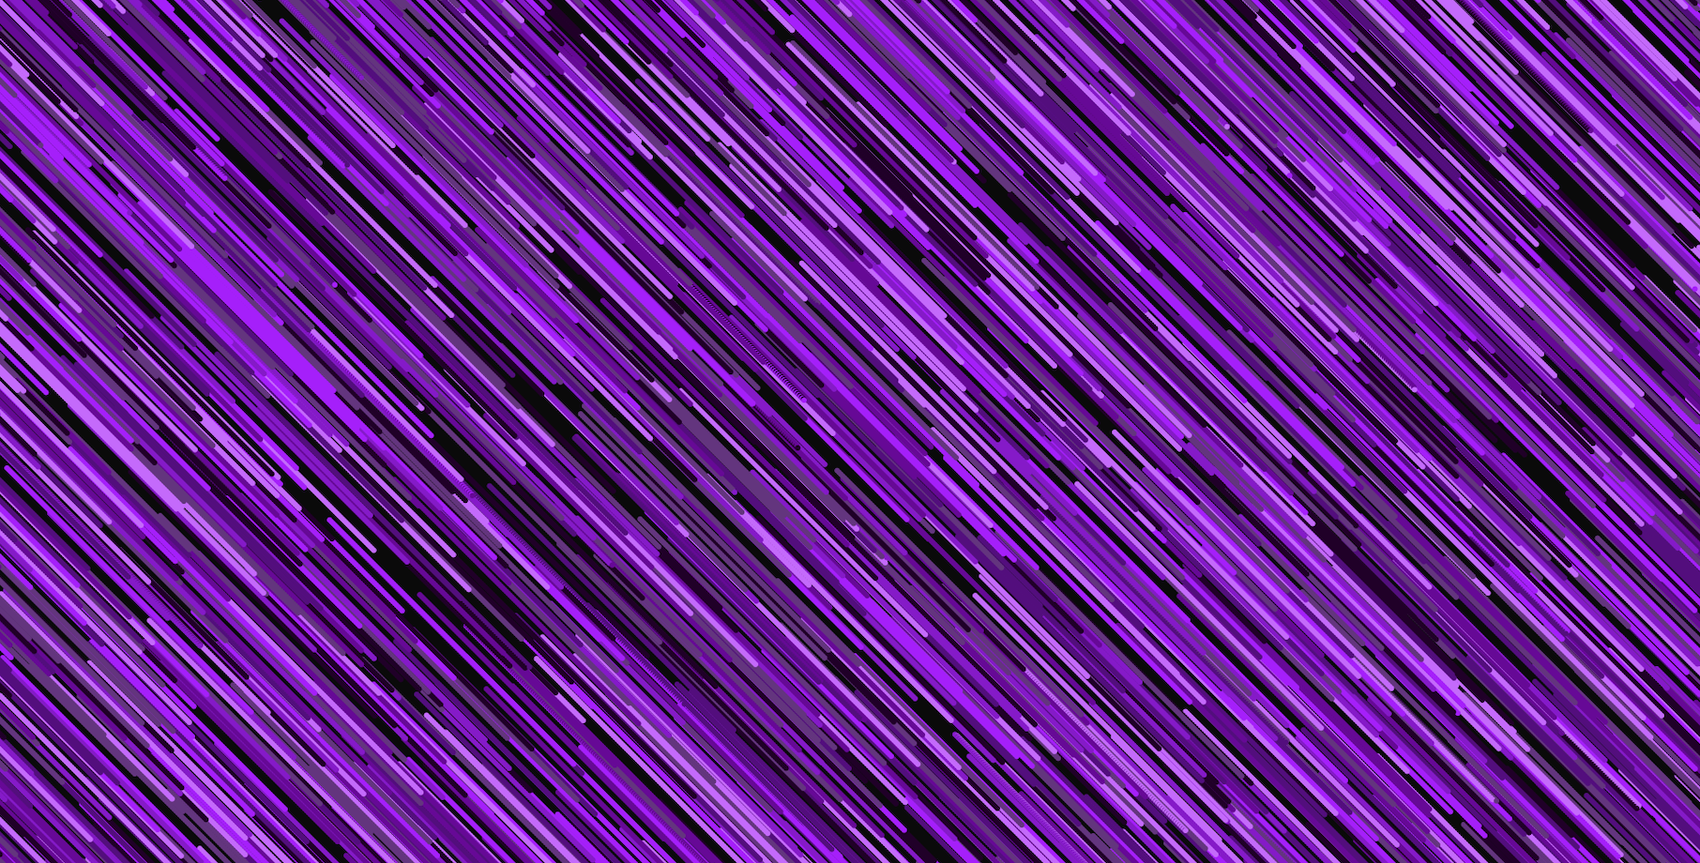
The circles become lines!
Rest assured, the circles are really moving, but my gifs were getting huge due to the poorly compressable content!
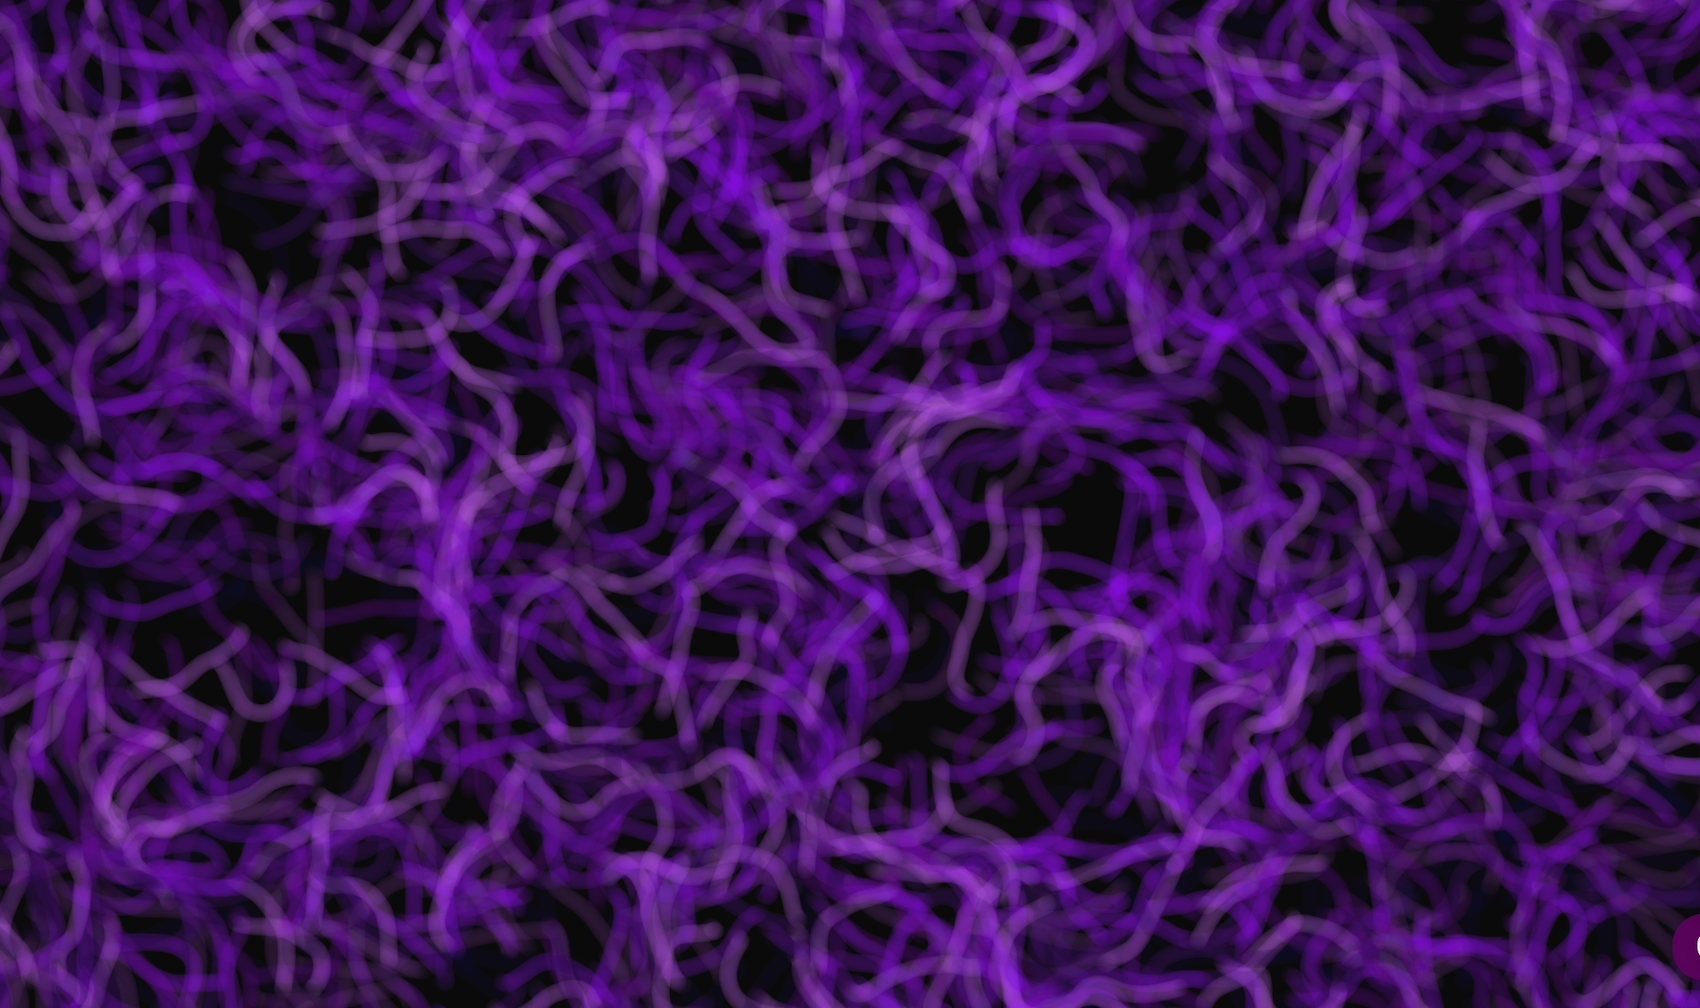
Changing around each particle's speed by a random amount between [-0.5, 0.5] and capping it at 2 renders a rather busy result.
(defn velocity
  "Calculates the next velocity based on the current and a delta. Capped at 2."
  [current delta]
  (mod (+ current delta) 2))


(defn sketch-update
  "Returns the next state to render. Receives the current state as a paramter."
  [particles]
  (map (fn [p]
         (assoc p
                :x  (position (:x p)  (:vx p) w)
                :y  (position (:y p)  (:vy p) h)
                :vx (velocity (:vx p) (q/random -0.5 0.5))
                :vy (velocity (:vy p) (q/random -0.5 0.5))))
particles))Let's introduce some Perlin noise to start heading for the effect we're after and attempt to calm things down a bit.
We will give each particle a direction from [0,2π] by use of Quil's Perlin noise function, based on the noise (i.e. a number between [0,1]) at the particle's location x and y in the noise map. We'll let this represent "the wind" that carries the particles across the screen with slight variations in direction. By averaging the current velocity and the Math/cos/Math/sin of the updated direction we keep it within bounds of [0,1]. To calm it down a bit we also scale the x and y values by the noise-zoom. By "zooming in" on the noise map, values close to each other will have increasingly similar random values, easing things out. This forms a great basis for creating natural looking flows of particles.
(def noise-zoom
  "Noise zoom level."
  0.0005)


(defn direction
  "Calculates the next direction between [0,2π] based on the perlin noise at the position (x,y)."
  [x y]
  (* 2
     Math/PI
     (q/noise (* x noise-zoom) (* y noise-zoom))))


(defn velocity
  "Calculates the next velocity by averaging the current velocity and the added delta."
  [current delta]
  (/ (+ current delta) 2))


(defn sketch-update
  "Returns the next state to render. Receives the current state as a paramter."
  [particles]
  (map (fn [p]
         (assoc p
                :x         (position (:x p) (:vx p) w)
                :y         (position (:y p) (:vy p) h)
                :direction (direction (:x p) (:y p))
                :vx        (velocity (:vx p) (Math/cos (:direction p)))
                :vy        (velocity (:vy p) (Math/sin (:direction p)))))
       particles))
Getting there!
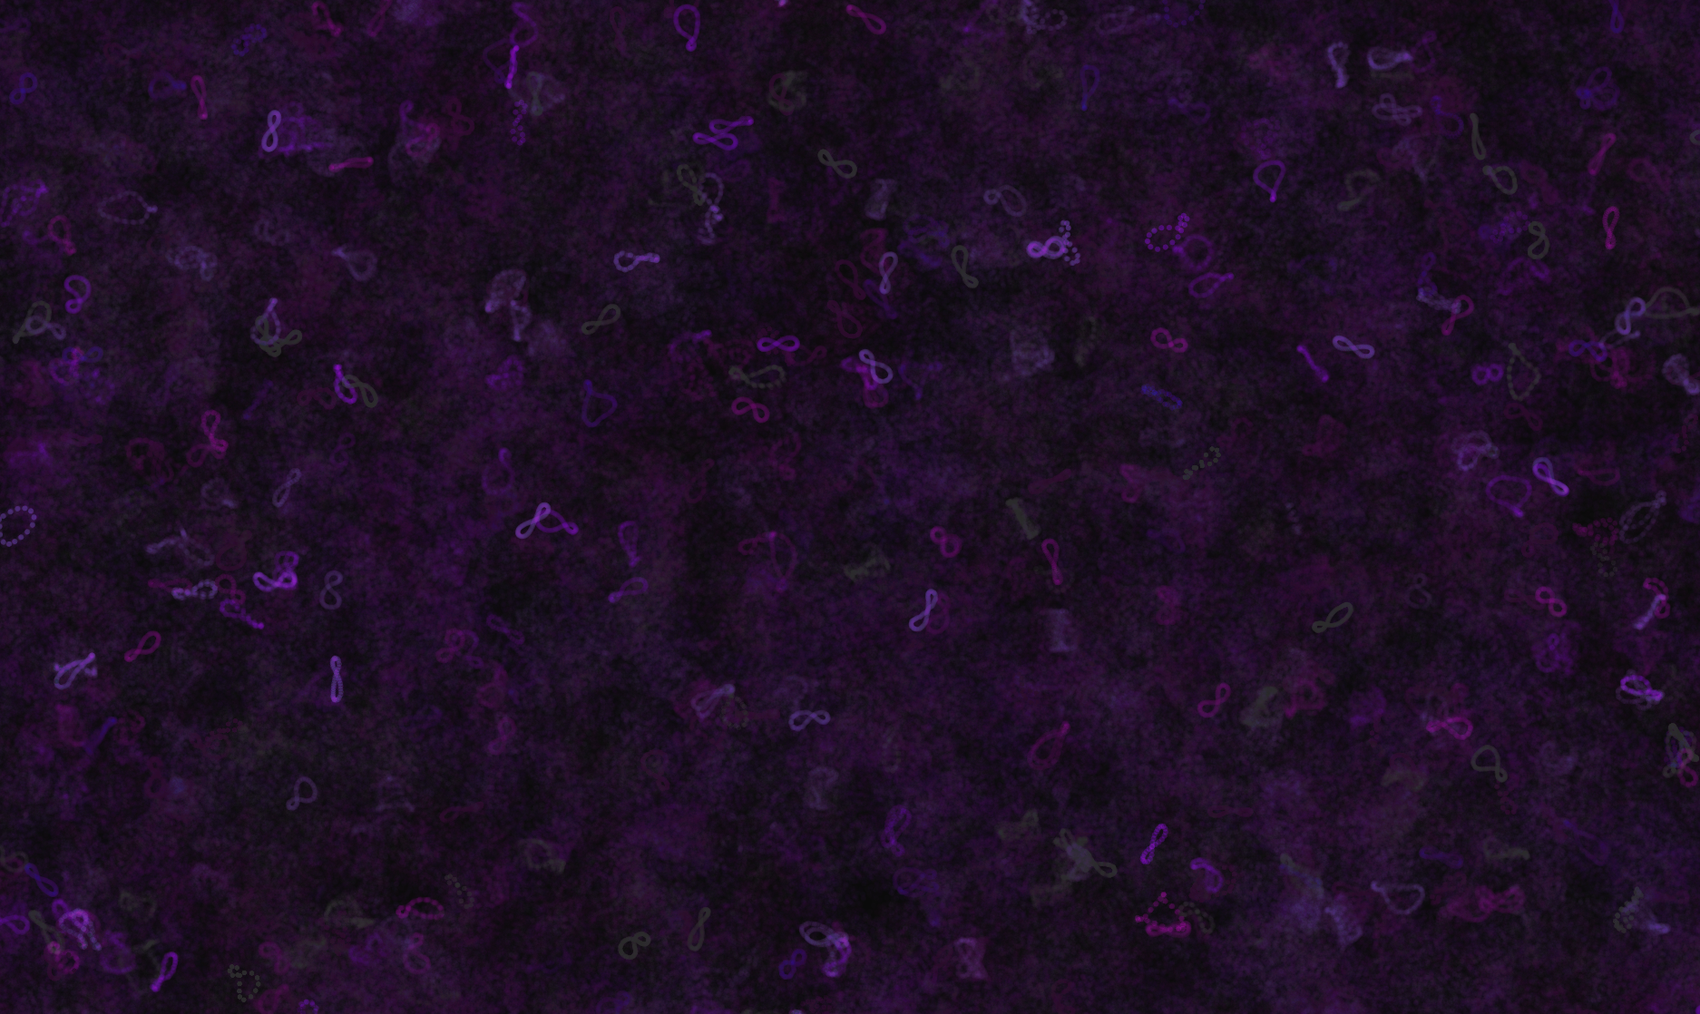
To make things more natural looking, let's introduce some more noise on a per particle basis, to add the effect of uniqueness to each particle's movement. We'll do this by adding a touch more perlin noise to each calculated direction by using the :id of each particle as a third argument to the q/noise function. This looks up the Perlin noise value in three dimensions, making it unique per particle.
(defn direction
  "Calculates the next direction based on the previous position and id of each particle."
  [x y z]
  (* 2
     Math/PI
     (+ (q/noise (* x noise-zoom) (* y noise-zoom))
        (* 0.2 (q/noise (* x noise-zoom) (* y noise-zoom) (* z noise-zoom))))))


(defn sketch-update
  "Returns the next state to render. Receives the current state as a paramter."
  [particles]
  (map (fn [p]
         (assoc p
                :x         (position (:x p) (:vx p) w)
                :y         (position (:y p) (:vy p) h)
                :direction (direction (:x p) (:y p) (:id p))
                :vx        (velocity (:vx p) (Math/cos (:direction p)))
                :vy        (velocity (:vy p) (Math/sin (:direction p)))))
       particles))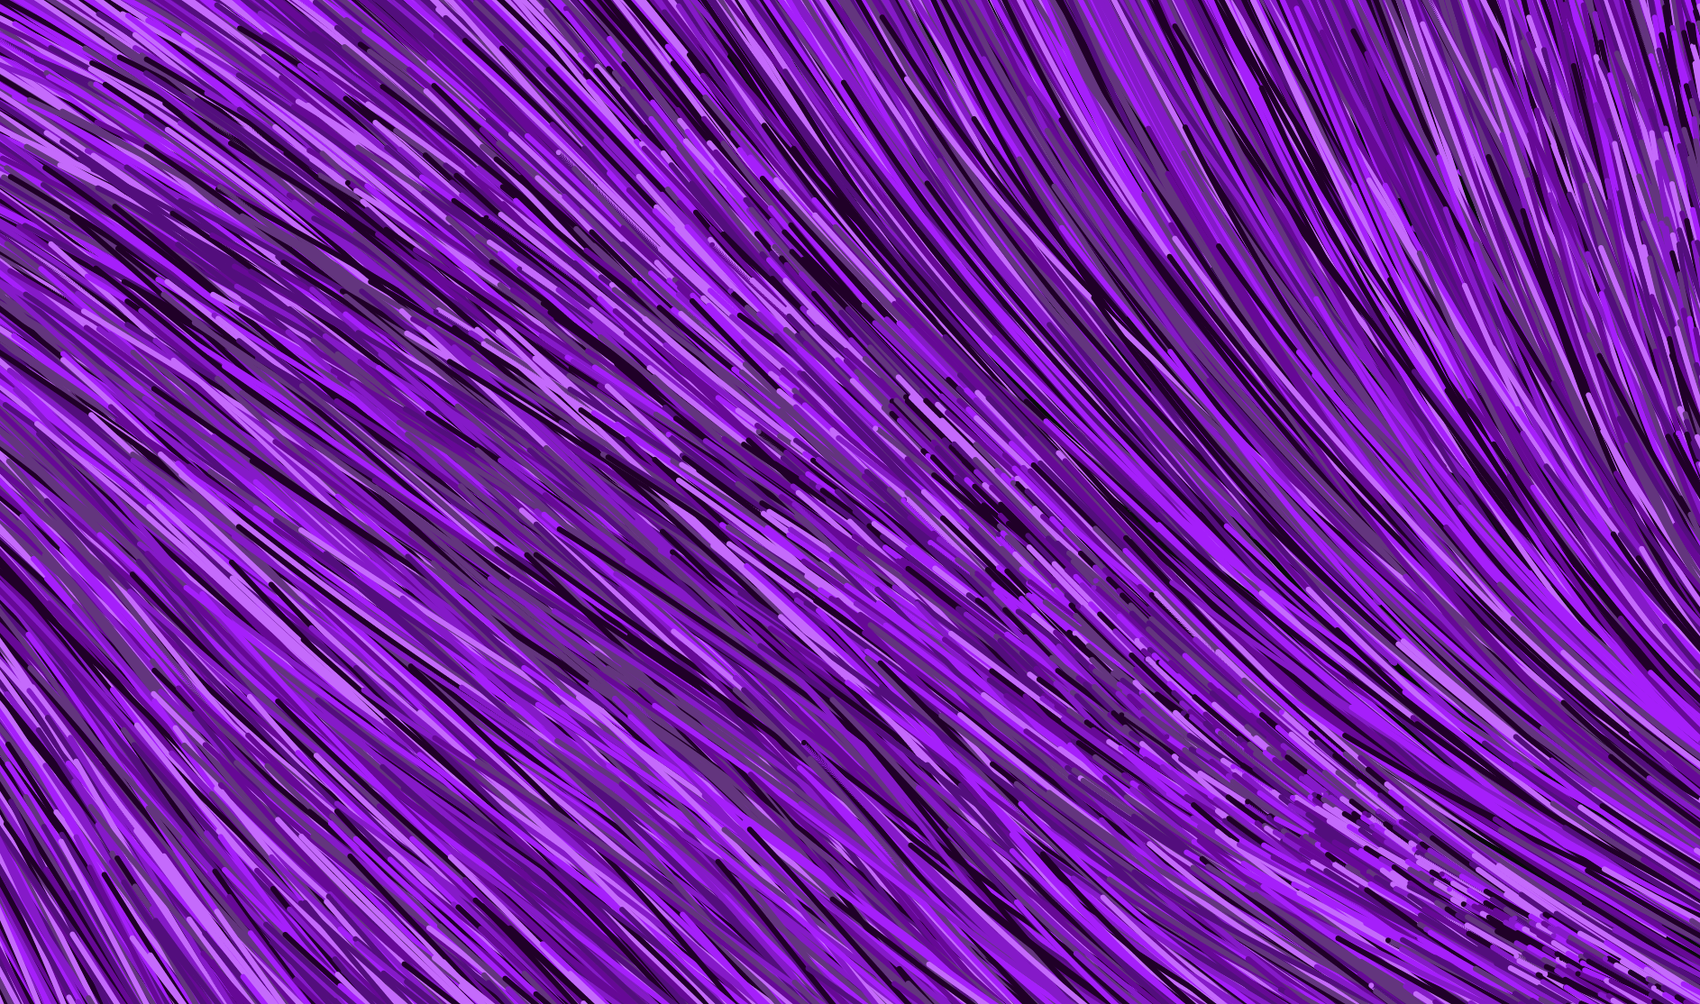
Not radically different, I hear you.
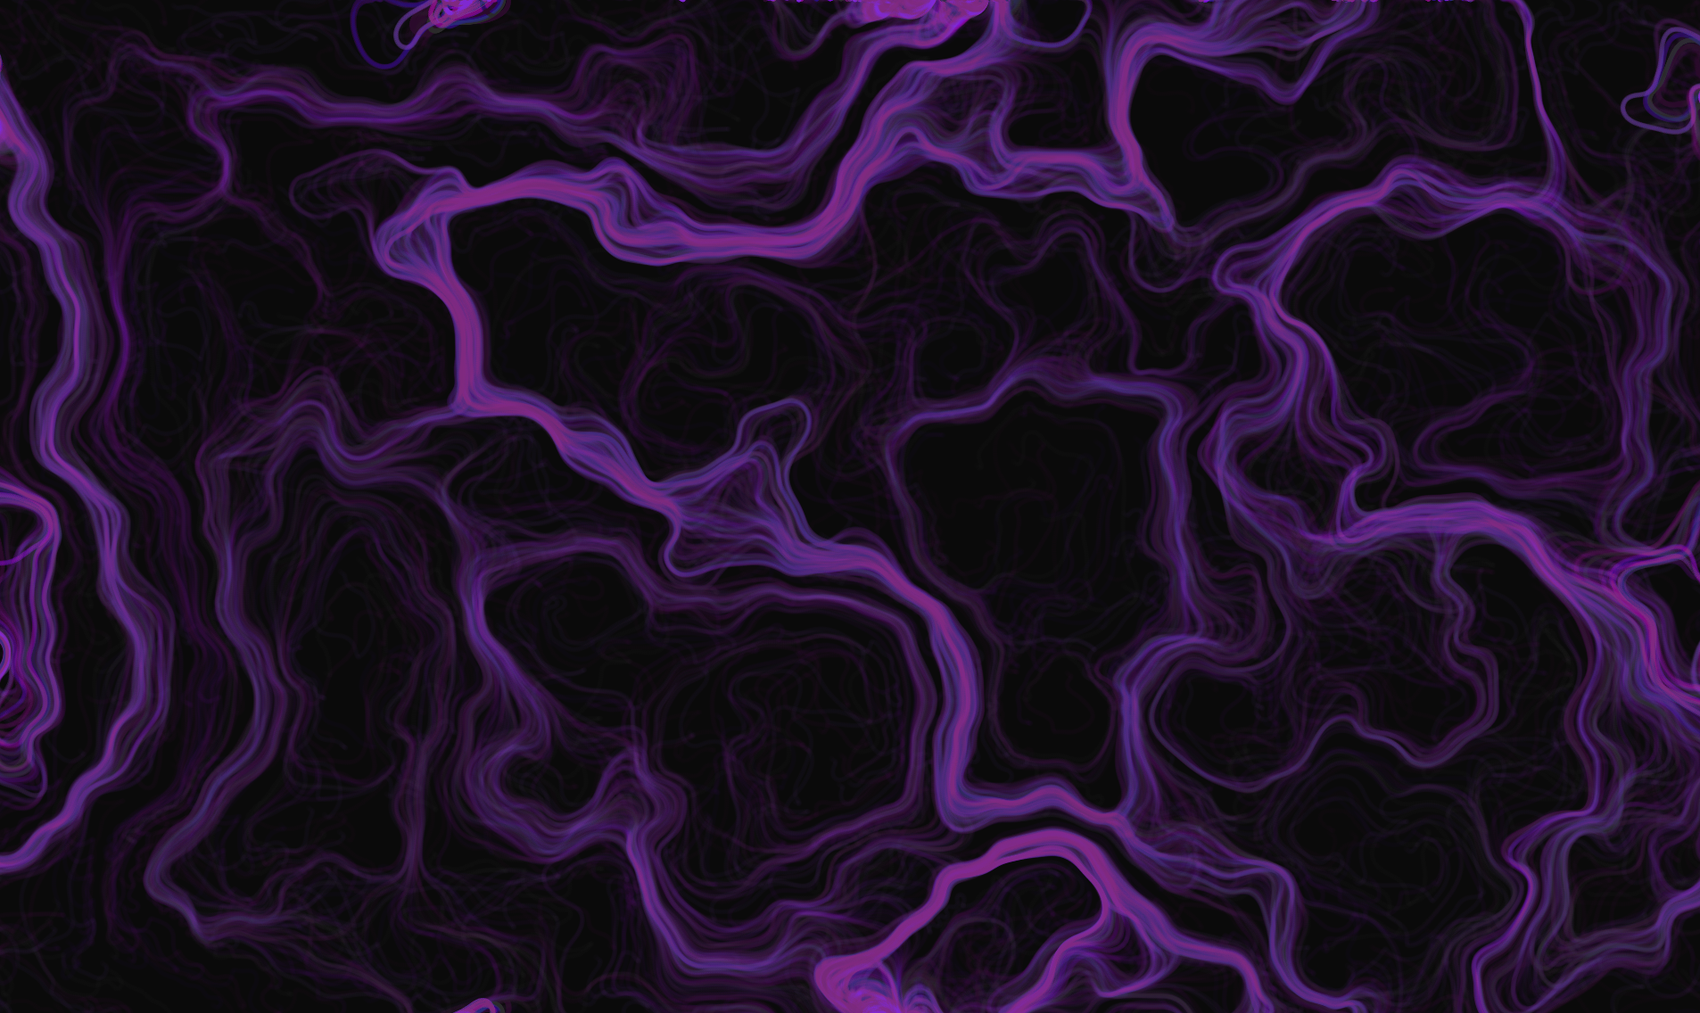
Now try this: adjust the noise-zoom scale by a slight increase. In this way we are effectively "zooming out" of the Perlin noise cloud, making its randomness more varying, making the curves stand out more in the drawing.
(def noise-zoom
  "Noise zoom level."
  0.005)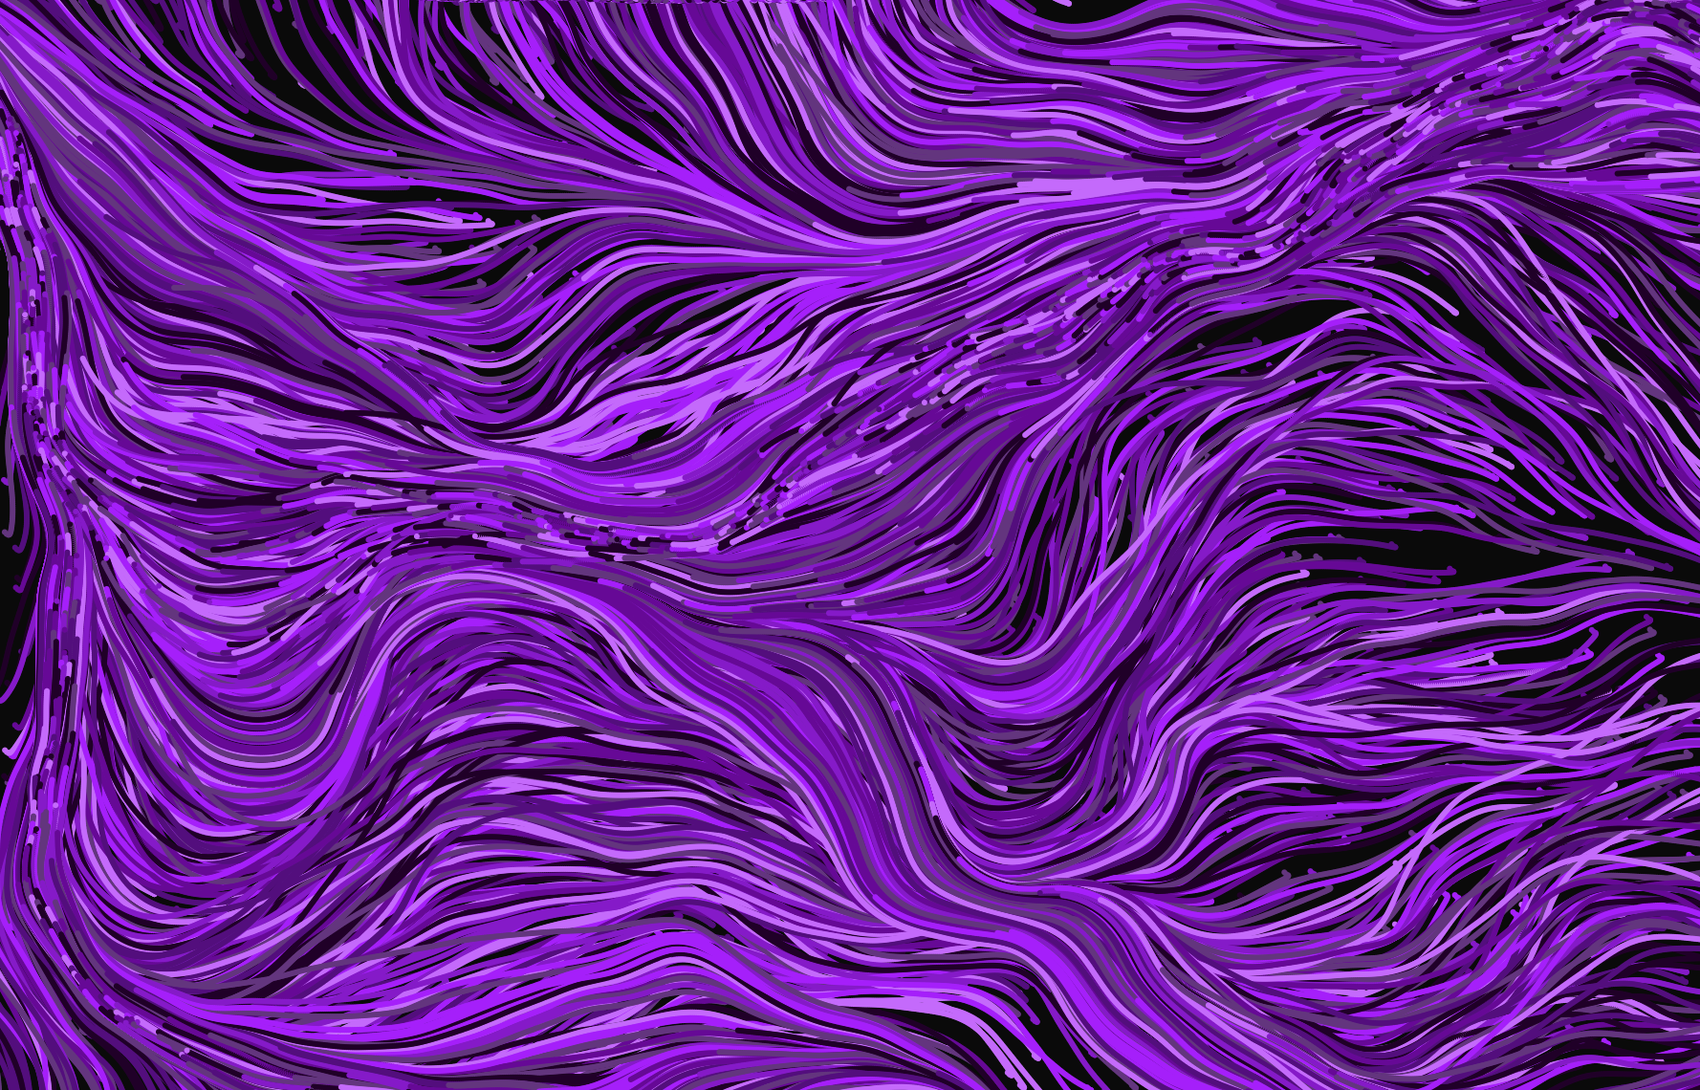
It flows!
Playing around with opacity often create stunning effects in sketches like these. Try modifying each drawn color by adding an alpha channel, of say 3, to the [r g b] color vectors making them [r g b a], e.g. so the first color of the palette becomes [32 0 40 3]. We'll do this for all our colors by appending 3 to each color vector as it is drawn. This is done using the cljs function conj.
(defn sketch-draw
  "Draws the current state to the canvas. Called on each iteration after sketch-update."
  [particles]
  ;;(apply q/background (:background palette))
  (q/no-stroke)
  (doseq [p particles]
    (apply q/fill (conj (:color p) 3))
    (q/ellipse (:x p) (:y p) (:size p) (:size p))))
Not immediately exciting, hang in there.
A couple of minutes later the following slowly appears!
That's it! Your own, personal, generative art masterpiece is complete!
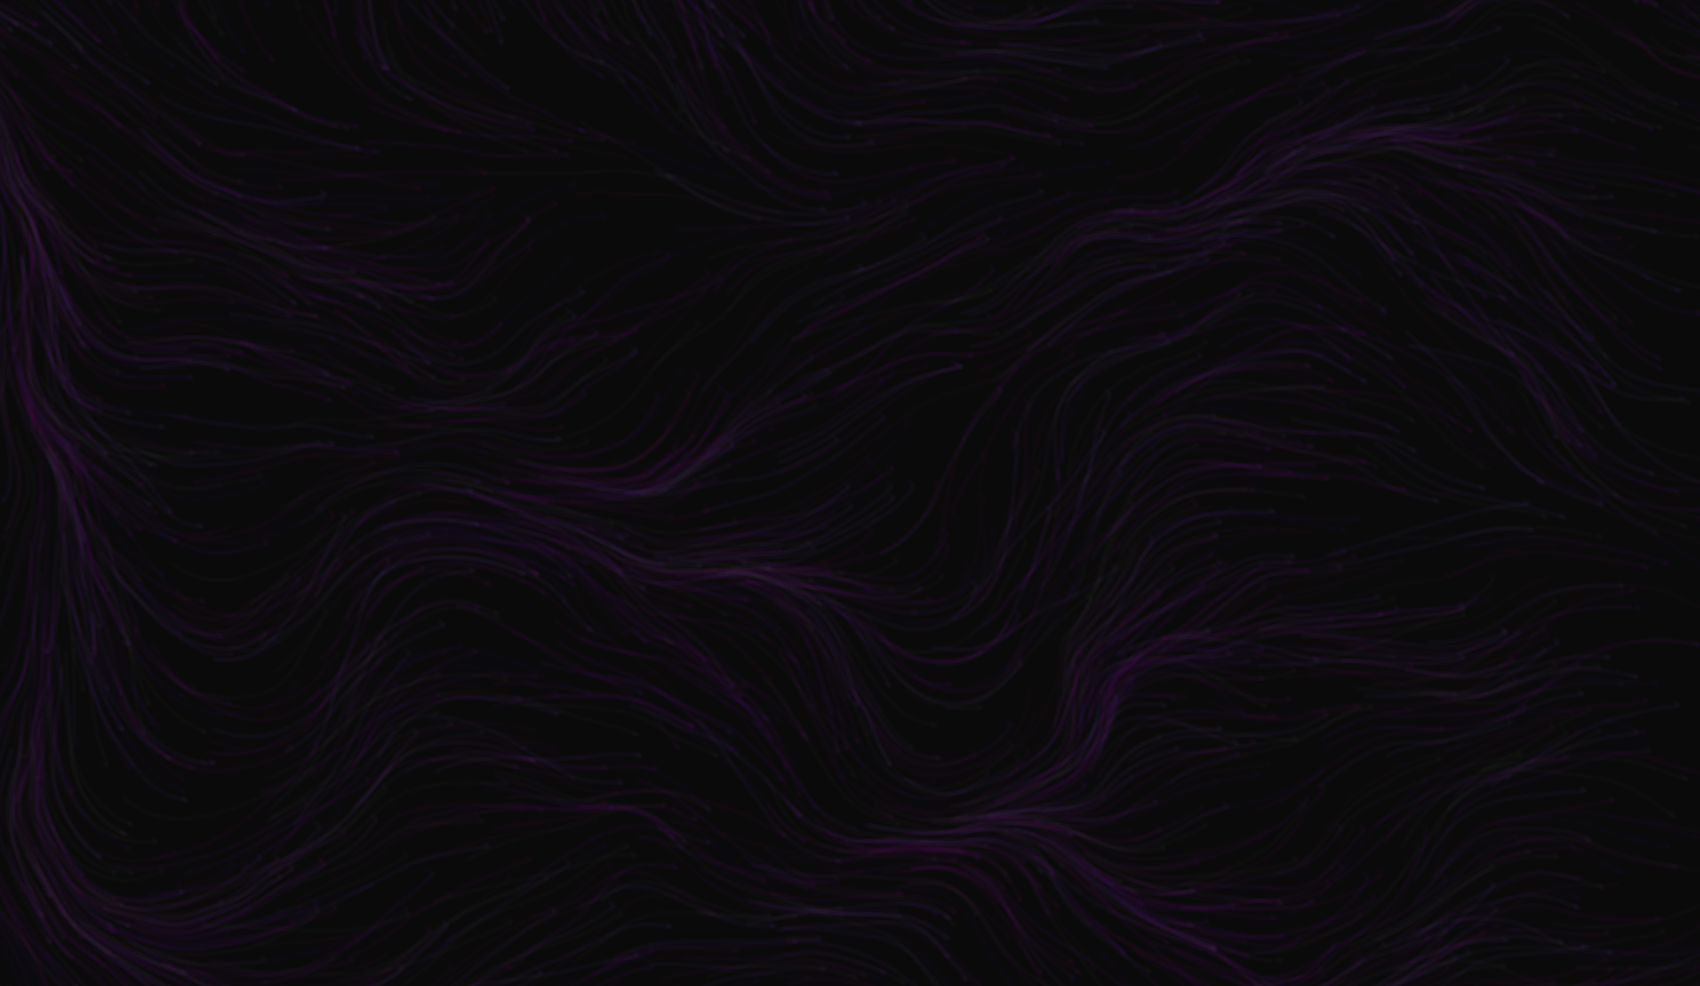
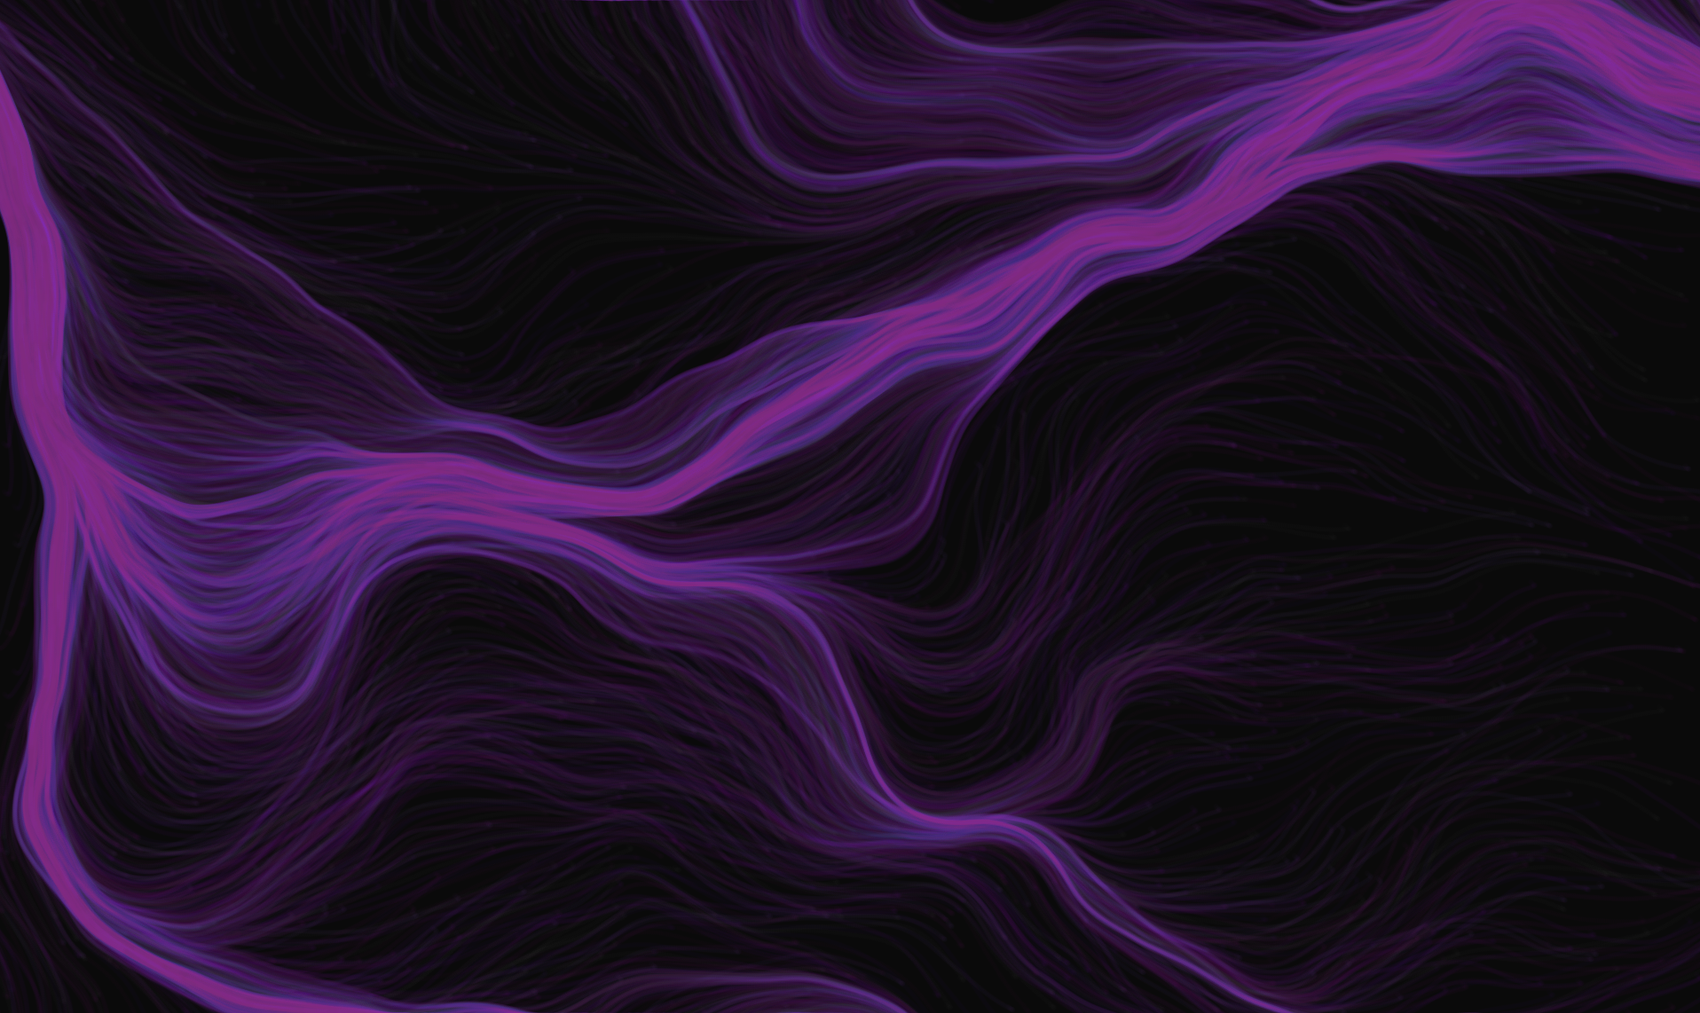
To finish off, here's a couple of more renders for inspiration, done only by tweaking some of the hard coded values in the sketch discussed.
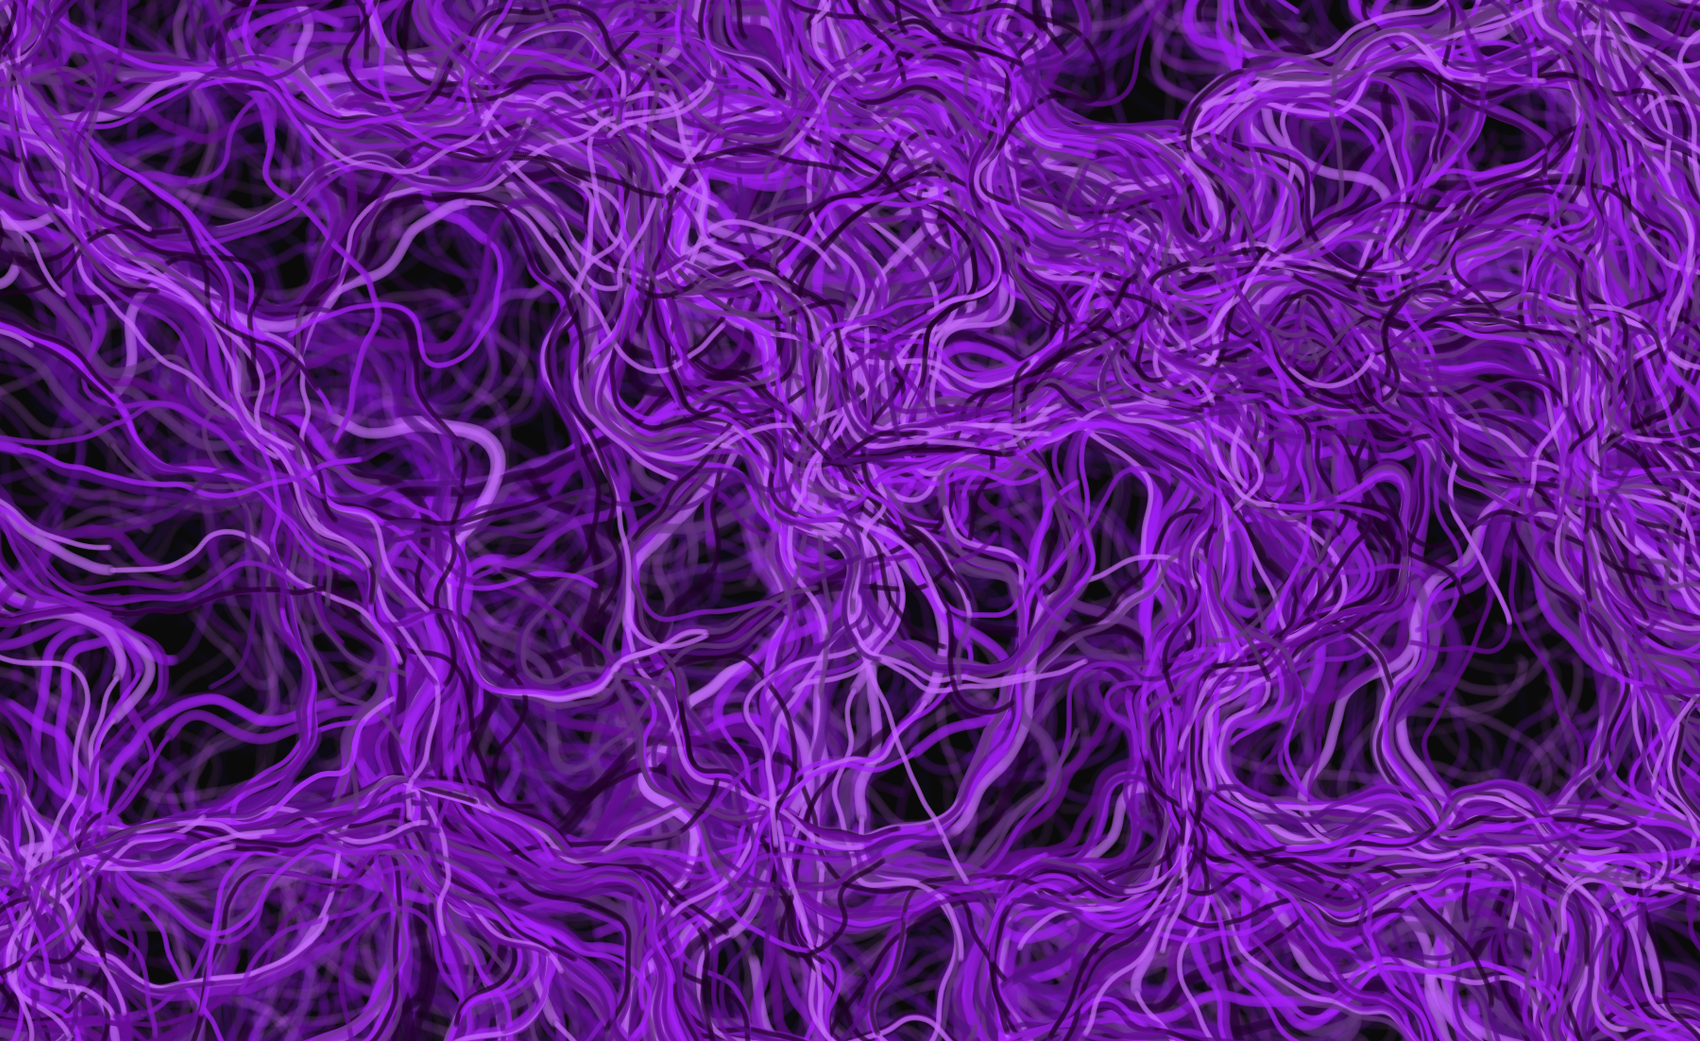
And while your artwork might feel complete by the time you read this, what you'll find once you start experimenting with these kinds of sketches on your own is that most often that not you will never "complete" these kind of art pieces, because of the sheer joy of seeing the radical effects that minor tweaks you make will have!
Suggestions for further experiments:
- extract constants to variables so you can change them while the art is drawn
- adjust the size of the particles
- increase the speed of the particles
- increase the angle of the direction by orders of a magnitude
- adjust each particle's uniqueness
- change stuff around while the drawing is progressing
- clear the background on each render again, so all lines become independent particles
- experiment with different color palettes
- try new seeds for the random functions, or simply remove the seeds altogether, creating new, unique art pieces every time you render the page
I hope you enjoyed this tutorial and that I encouraged you to experiment with generative art on your own! Don't hesitate to hit me up with questions over at twitter.com/torgeir or github.com/torgeir.