The data engineering toolbox is growing as the industry adapts to increasing data. We need tools to process data to unlock its value efficiently. One such tool is Apache Beam. This article aims to introduce key Apache Beam concepts and provide an example of implementing a data pipeline.

🚀 Introduction
We have all heard about the fuzz arising from the world of data: AI, data is the new oil, big data, or being data-driven. To latch on to all the hype, we have to begin somewhere. That somewhere is finding ways to extract and enrich your data. Building data pipelines can feel overwhelming, and it is often tough to figure out where to begin. In a possibly futile attempt to demystify and concretize data pipelines, I will introduce Apache Beam.
Apache Beam is a framework to define batch and stream data pipelines. It aims to simplify and enable large-scale parallel data processing. By utilizing Beam, you get multiple benefits, including portability. With different Beam-runners, you can run your pipelines on various platforms using the same code. For instance, you can develop and test locally using the DirectRunner, and then use DataflowRunner to run the pipeline on the Google Cloud Platform (GCP). Another benefit of Apache Beam is that it offers different Beam SDKs, which allows you to develop pipelines using Python, JVM-based languages (such as Java, Scala, and Kotlin), or Go.
⚙️ Requirements
To run the code in this article, you need to install Python version 3.6 or higher. Then, you need to install Apache Beam and PyArrow. You can use the following commands to install these packages using pip:
pip install apache-beam
pip install pyarrow
If you want to test out the JDBC or SQLTransform modules that are mentioned later in the article, you need to install Java(Version 17) and Docker.
🌐 The Beam API
Apache Beam consists of several functions to load, filter, manipulate and write data to and from different sources. The following sections briefly introduce some of the essential parts of the Apache Beam API. This article focuses on batch pipelines using the Python SDK; however, you can write almost exactly the same code for streaming pipelines. For more details, check the documentation.
As a side note, I recommend you combine and play with the different Beam-functionalities we will discuss. Also, add a print step between steps to see how the data is manipulated, as this can be a helpful way to understand how Apache Beam truly works.
Defining the pipeline
When defining a pipeline, we must start by importing Apache Beam and creating a pipeline object. Using the pipeline object, we can define different steps in the pipeline:
import apache_beam as beam
with beam.Pipeline() as pipeline:
    # Define steps in pipeline using the following syntax
    pipeline_output = (
        pipeline
        | read_data_from_source
        | "Optional description of pipeline step" >> first_transform
        | second_transform
        | ...
        | write_to_some_sink
    )
Pipeline input with beam.Create and apache_beam.io.*
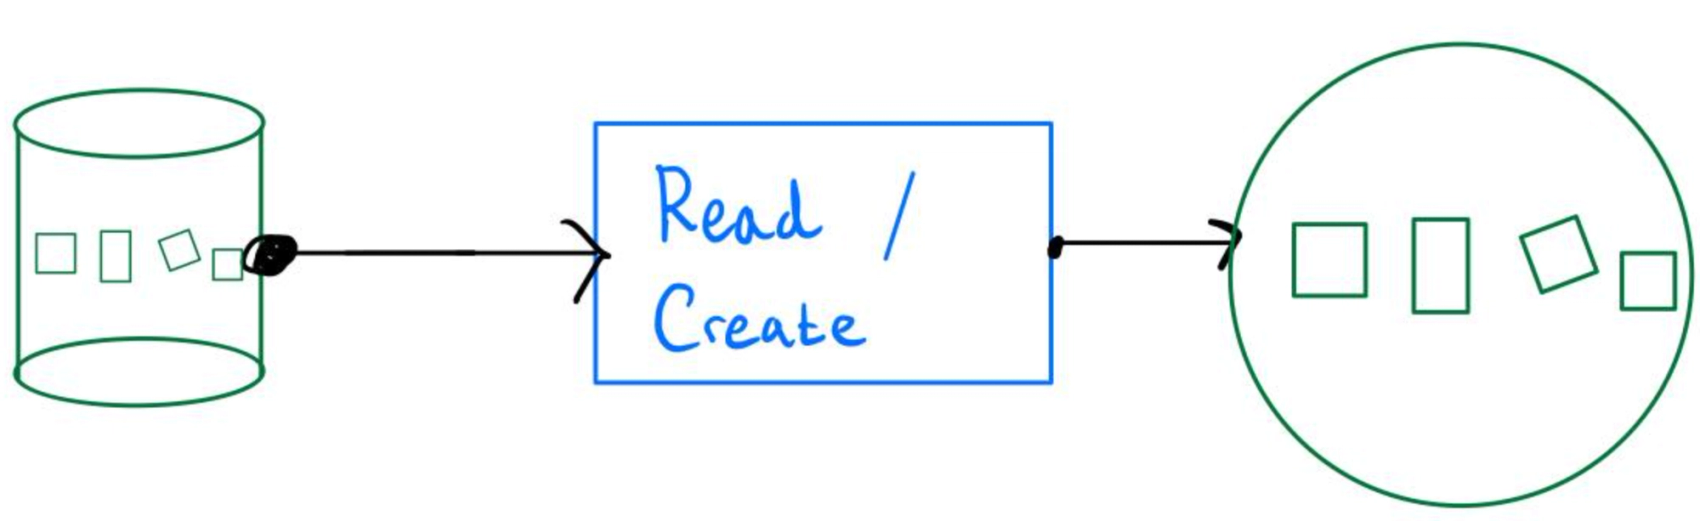
The primary way to start a pipeline is by reading data from a source. Apache Beam ships with standard I/O connectors that you can use to read data from various sources. For example, you can read from a SQL server using JDBC like this:
import apache_beam as beam
from apache_beam.io.jdbc import ReadFromJdbc

with beam.Pipeline() as pipeline:
    pipeline_output = (
       pipeline
          | 'Read from JDBC' >> ReadFromJdbc(
              driver_class_name='org.postgresql.Driver',
              jdbc_url='jdbc:postgresql://localhost:5432/example',
              username='postgres',
              password='postgres',
              query='SELECT * FROM example_table',
             )
          | first_transform
          | ...
    )
If you want to initialize a pipeline without loading directly from a data source, you can load data programmatically using beam.Create:
pipeline
    | beam.Create("This input will initialize data, which will be a list of strings".split(" "))
After loading data from a source or via beam.Create, the data is loaded into a PCollection. A PCollection is when Beam has loaded your data into a parallel collection. Data in PCollections is immutable and can be distributed over different threads and/or machines.
beam.ParDo
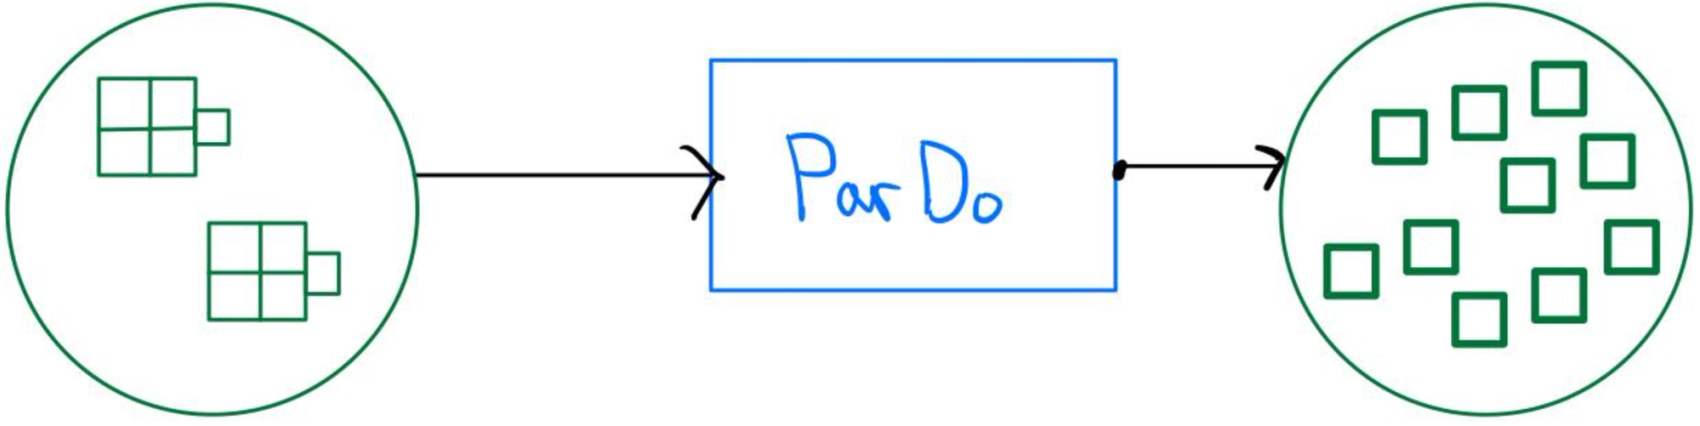
The ParDo function in Apache Beam takes a regular Python function and applies it to each element in a PCollection. This is known as a PTransform in the Beam world. A ParDo outputs one or more elements from a single input. The syntax for using ParDo is straightforward: you call it using the beam.ParDo method:
pipeline
         | read_data_from_source
         | beam.ParDo(lambda x: some_function(x))
         | ...
beam.Map
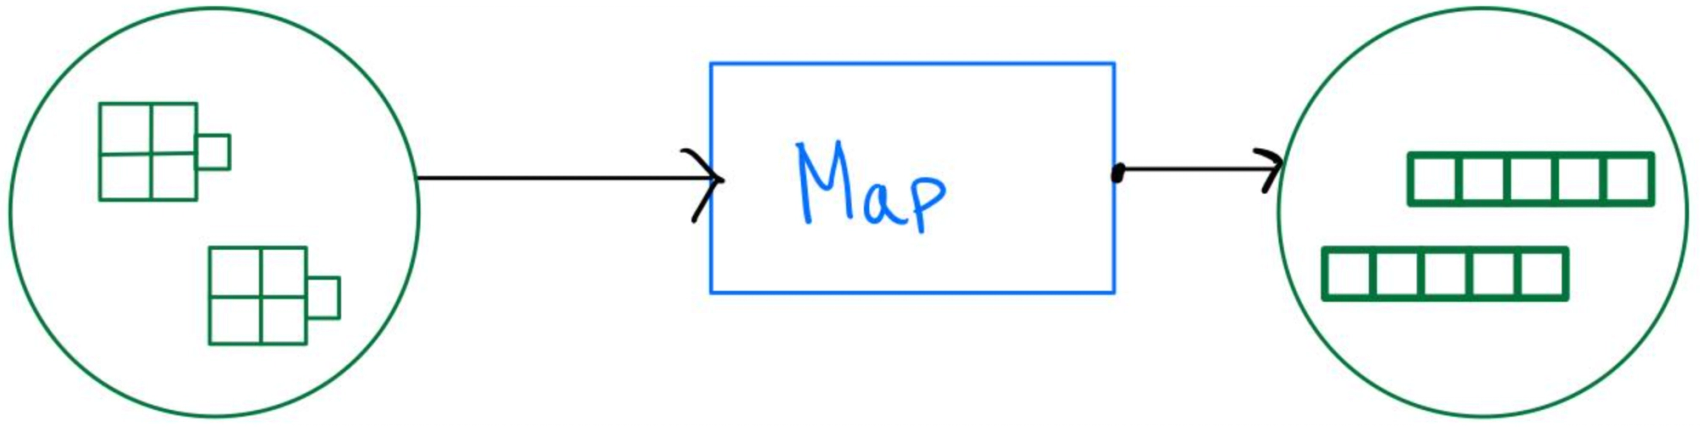
Map is a special case of ParDo in Apache Beam. Like ParDo, Map applies a function to each element in a PCollection, but it always outputs a single element for each input element rather than a one-to-many mapping. The syntax for using Map is the same as ParDo. You simply need to swap out the ParDo method with Map:
beam.Map(lambda x: some_function(x))Map vs ParDo
To further demonstrate the difference between Map and ParDo, imagine some function in a pipeline step that takes in a word and returns the char array of the word. Let's compare:
PCollection("hello", "world") -(ParDo)-> PCollection("h", "e", "l", "l", "o", "w", "o", "r", "l", "d")
PCollection("hello", "world") -(Map)-> PCollection(["h", "e", "l", "l", "o"], ["w", "o", "r", "l", "d"])
As we see, ParDo yields ten elements that will be passed to the next step of the pipeline, and Map yields two. Sometimes we need to maintain the relationship between the elements, and sometimes we don't. This is important to keep in mind when developing a pipeline. For instance, if the pipeline's goal is to count each letter's occurrences, then a ParDo will be a much better choice. This is because ten elements will be distributed across threads and machines, compared to two.
beam.Filter
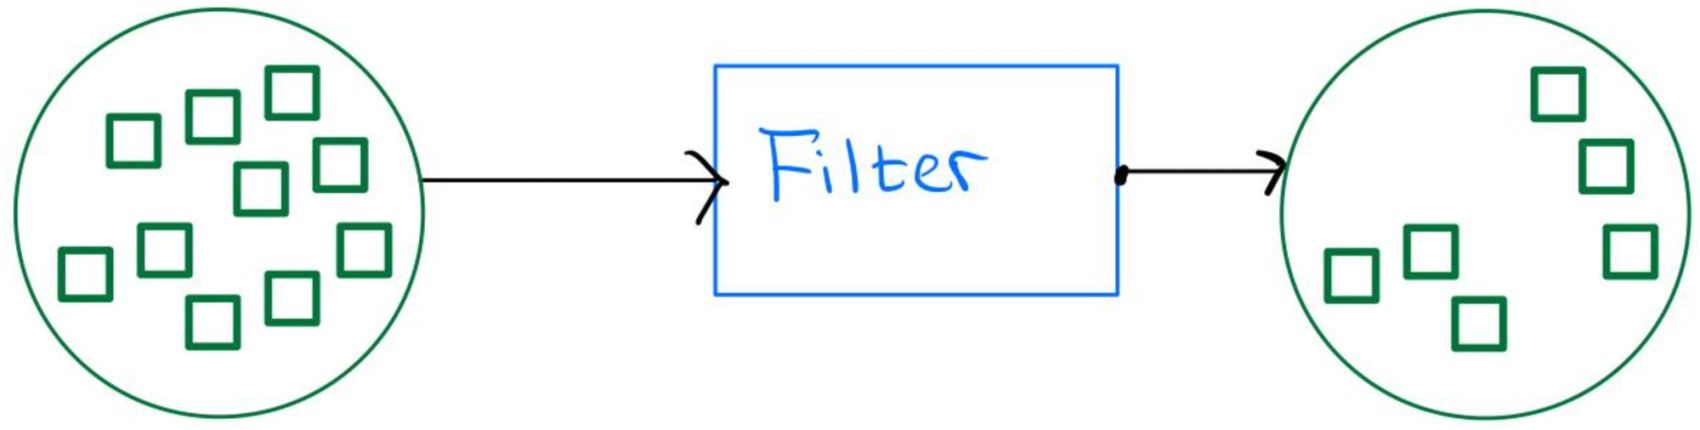
If we need to filter out some rows in the dataset, we can use the filter function in the following way:
beam.Filter(lambda x: some_boolean_function(x))SQL and beam.coders
By utilizing Python type-hints, we can define transformation steps using SQL. To do this, we need to register the type that the SQL query is based on using beam.coders. Next, by annotating a function in a Map or a ParDo step with the registered type, we can follow up with a SQL transformation:
import apache_beam as beam
from apache_beam.transforms.sql import SqlTransform
from typing import NamedTuple

class OutputSchema(NamedTuple):
    first_name: str
    last_name: str

def transform_1(x) -> OutputSchema:
    return OutputSchema(first_name=x.first_name, last_name=x.last_name)

with beam.Pipeline() as pipeline:
    beam.coders.registry.register_coder(OutputSchema, beam.coders.RowCoder)

    pipeline_output = (
        pipeline
        | read_data_from_source
        | beam.ParDo(transform_1) # Transform 1 now returns with a type
        | SqlTransform("SELECT first_name, count(first_name) AS name_count FROM PCOLLECTION WHERE some_condition GROUP BY first_name")
        | ...
    )
beam.GroupBy
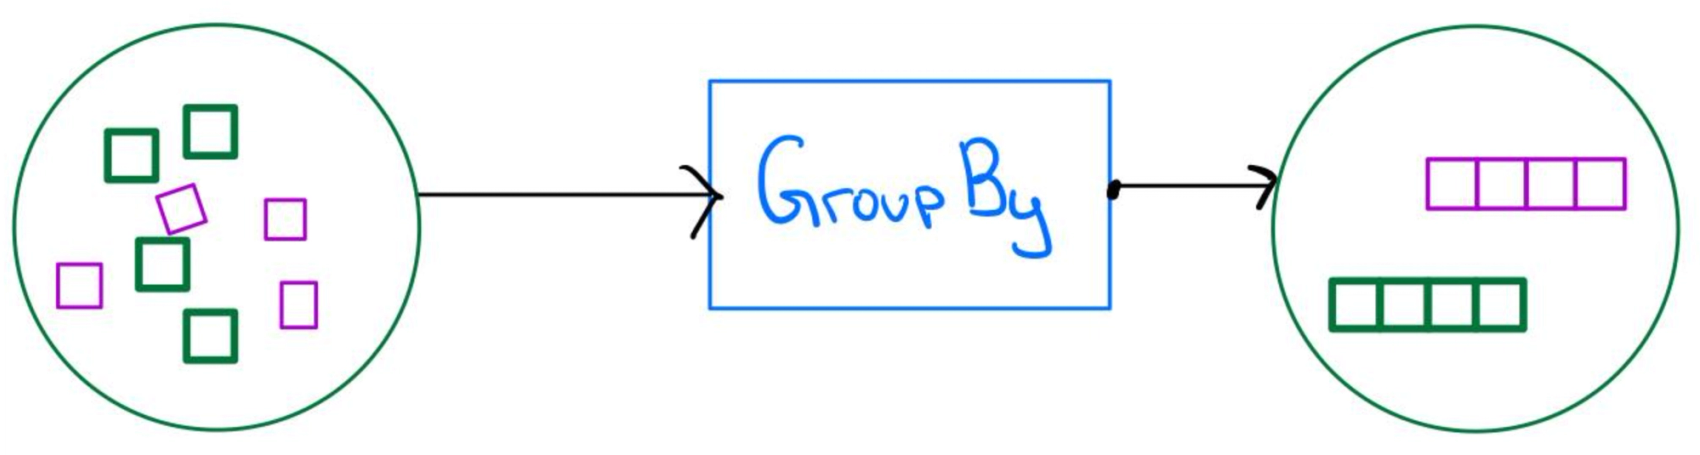
If we need to do operations on the PCollection that requires data to be grouped, we can utilize the beam.GroupBy function. GroupBy takes in the column name to be grouped. Note that this requires the type to be registered similarly to the SqlTransform. GroupBy will return a tuple containing the key and all items belonging to that group in a list. The syntax is straightforward:
beam.GroupBy("column_name")Writing to a sink
Beam offers several ways to write data to various sinks. One popular option is the Parquet file format, which is well-suited for storing large amounts of data efficiently, thanks to its columnar storage. By supplying the storage path and the parquet schema, we can define the write-to-sink step:
from apache_beam.io.parquetio import WriteToParquet
import apache_beam as beam
import pyarrow

...

parquet_schema = pyarrow.schema([
    pyarrow.field("column_name", pyarrow.string()),
    pyarrow.field("column_2_name", pyarrow.binary(), metadata= { ... } )
])

with beam.Pipeline() as pipeline:
    pipeline_output = (
        pipeline
        | ...
        | beam.ParDo(lambda x: { "column_name": x[0], "column_2_name": x[1] })
        | beam.io.parquetio.WriteToParquet('gs://some_gcs_path', schema=parquet_schema)
        # ^ gs:// refers to a google storage path
    )
Using WriteToParquet, Beam automatically handles how to partition and write the data efficiently to the sink. Super convenient!
🧑🔬 Tying it all together
Now, we're going to make an end-to-end pipeline by using the components we have learned about:
import apache_beam as beam
import pyarrow
from typing import NamedTuple

class NameSchema(NamedTuple):
    first_name: str
    last_name: str

def get_first_and_last_name(x) -> NameSchema:
    splitted_name = x.split(" ")
    return NameSchema(first_name=splitted_name[0], last_name=splitted_name[-1])

parquet_schema = pyarrow.schema([
    pyarrow.field("first_name", pyarrow.string()),
    pyarrow.field("first_name_count", pyarrow.int64())
])

with beam.Pipeline() as pipeline:
    beam.coders.registry.register_coder(NameSchema, beam.coders.RowCoder)
    pipeline_input = ["Jonas Wagle", "Karsten Nilsen", "Jonas Brothers", "Anders Nilsen", "Kathrine Olsen", "Ola Normann"]

    pipeline_output = (
        pipeline
        | "Generate base PCollection with some names" >> beam.Create(pipeline_input)
        | "Get first and last name named tuple" >> beam.Map(get_first_and_last_name) # get_first_and_last_name now returns with a type
        | "Group by first name" >> beam.GroupBy("first_name")
        | "Map to corresponding pyarrow schema" >> beam.Map(lambda x: { "first_name": x[0], "first_name_count": len(x[1]) })
        | "Filter out first names that occur once" >> beam.Filter(lambda x: x["first_name_count"] > 1)
        | "Write to Parquet" >> beam.io.parquetio.WriteToParquet('./tmp/hello.parquet', schema=parquet_schema)
    )
To run the code above, navigate to some folder and save it in a file called first_name_count.py. Run the pipeline by opening a terminal in the same folder and then run python first_name_count.py. We see that the pipeline outputs a dataset with two columns: first_name and first_name_count.
Data lineage
Imagine that another person or team wants to use our dataset to find the least common names. When looking at the data that our pipeline produced, they would see a list of names and their respective counts. But as we know, our pipeline filters out all first names that occur once, which renders the data unusable for that use case. This demonstrates a common problem about using datasets that are not ours: how can we trust the data?
This is something data lineage aims to solve. Data lineage describes the processing steps of the data from source to sink. With Apache Beam, we can extract the automatically generated execution graph:
import apache_beam as beam
from apache_beam.runners.interactive.display import pipeline_graph

...

with beam.Pipeline() as pipeline:
    ...

    print(pipeline_graph.PipelineGraph(pipeline).get_dot())
Where the last line will output a dot graph that can be visualized using a GraphViz-visualizer.
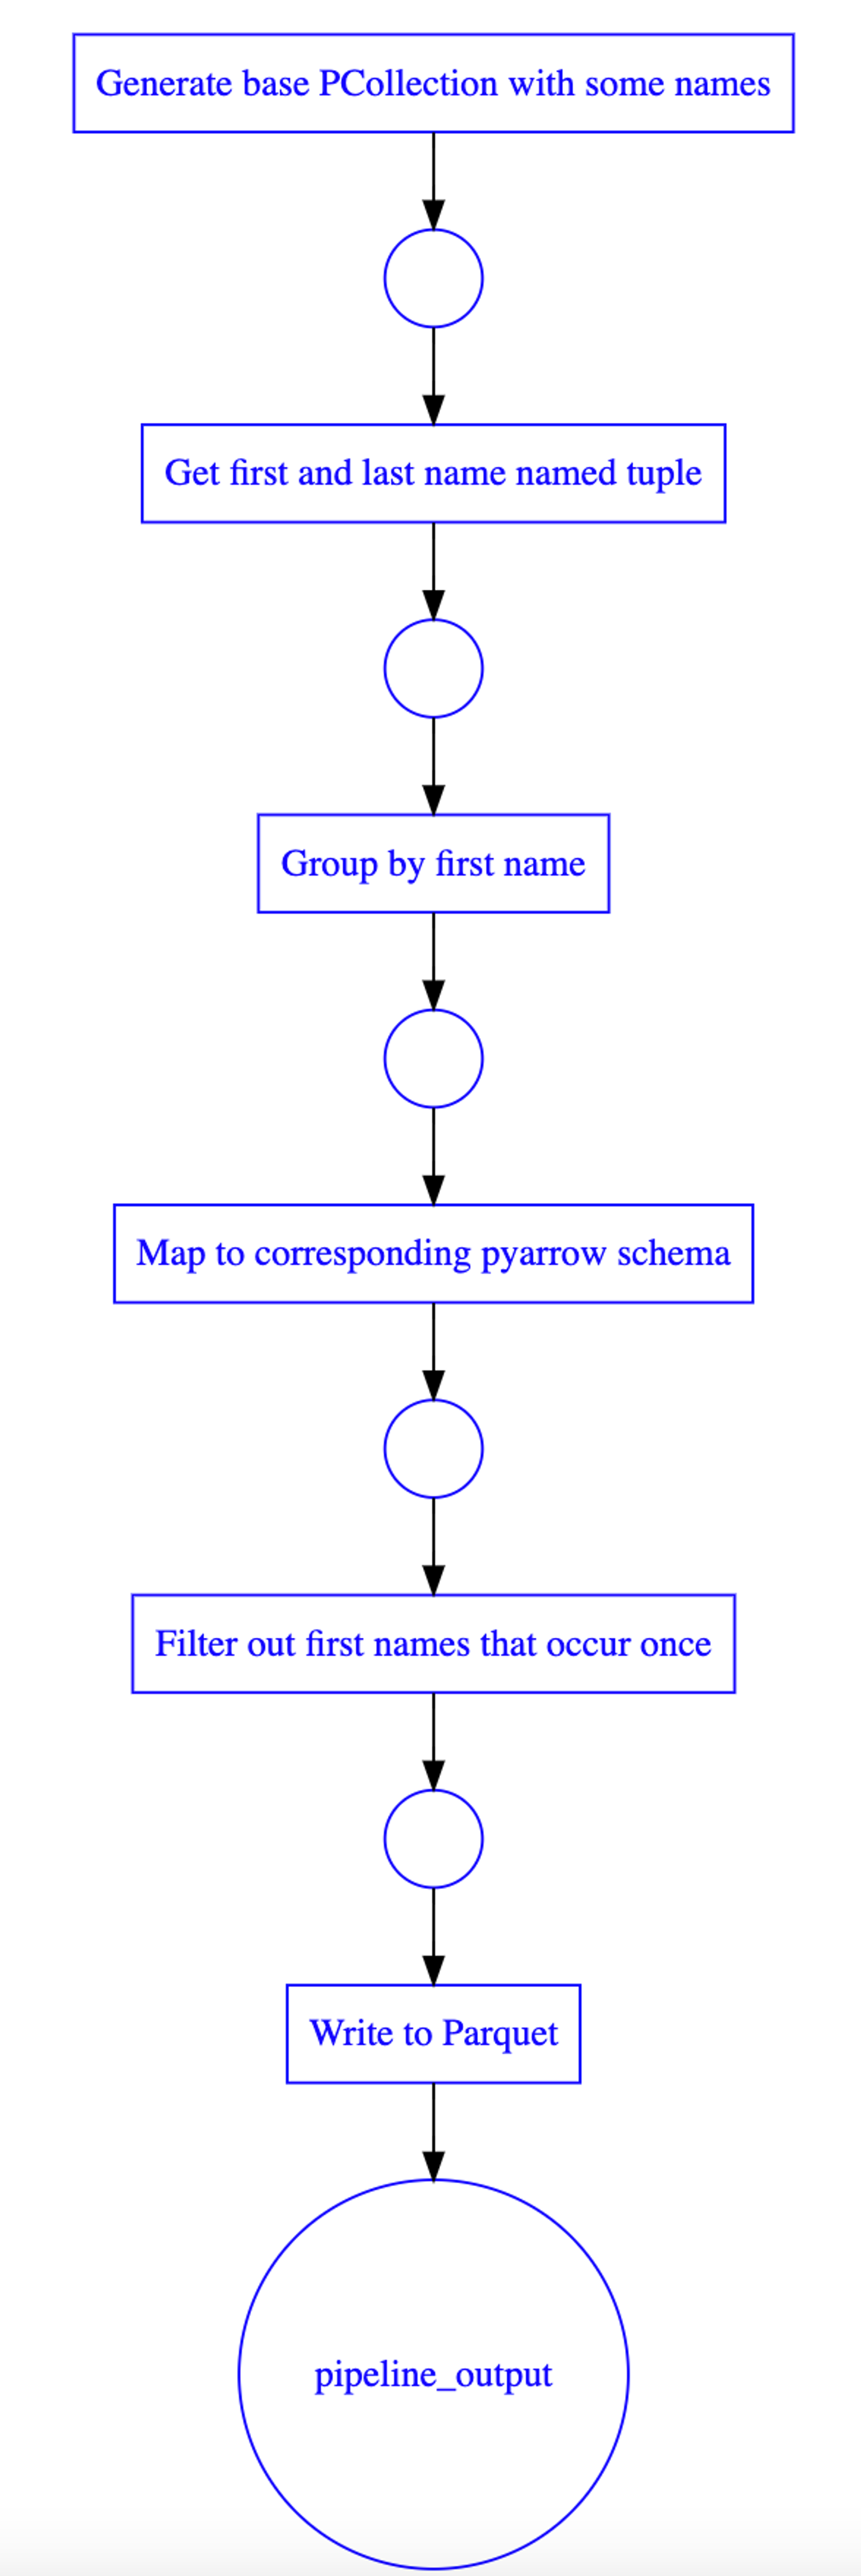
The graph should be stored near the data, for instance, in a data catalog. This way, we can establish trust between the ones that produce and consume data. In the example above, by looking at the data lineage graph, the data consumers would instantly find this dataset unsuitable for their use case.
🪄 Final remarks
Apache Beam is a powerful tool for starting to process your data. It has an active community with new features constantly being under development. Beam helps you speed up the process of making your data available for analysis in a way that promotes trust between the producers and the consumers of the data.
Hopefully, you feel like it is a little bit easier to start building pipelines. Thank you for reading my simple introduction to Apache Beam! 🌞
Sources
- Apache Beam documentation
- IBM, data catalog